Your Trusted Source for Home Fixes & Guides

How to Make Bifold Doors: Step-by-Step DIY Guide in 2026

Making bifold doors yourself is a project many homeowners consider, especially if you want to add style and save on installation costs. Bifold doors are popular for closets, pantries, laundry rooms, and even as room dividers. They save space, look modern, and can be customized to fit your home’s design.
If you’ve never tackled a door project before, don’t worry—this guide will walk you through everything, from understanding how bifold doors work to actually building and installing them.
A few years ago, I helped a neighbor replace old, sticky sliding closet doors with custom bifold doors. The transformation was impressive—not only did the room feel larger, but the doors opened smoothly and looked much cleaner. With the right tools, some patience, and the tips in this article, you can achieve the same results.

Let’s break down the process, highlight the most important steps, and share some insights and pitfalls to avoid. By the end, you’ll know exactly how to make bifold doors that look professional and function perfectly.
What Are Bifold Doors?
Bifold doors are made from two (or more) panels hinged together, allowing them to fold back against each other when opened. They’re attached to a track at the top and sometimes the bottom, which guides their movement. Because they fold rather than swing, bifold doors are perfect for small spaces where a swinging door would be impractical.
You’ll find bifold doors in many styles—solid wood, hollow core, louvered, glass-paneled, or even mirrored. Choosing the right style for your project is important for both appearance and functionality.
Planning Your Bifold Door Project
Before you cut any wood or buy hardware, you need a clear plan. This is where many DIYers go wrong. Planning saves you time, money, and headaches later.
Measure Twice, Cut Once
Accurate measurement is key. Grab a steel tape measure, a notepad, and a pencil. Measure the width and height of the door opening in three places each—top, middle, and bottom for width; left, center, and right for height. Use the smallest measurements. Standard interior door openings are often 80 inches tall, but yours may vary, especially in older homes.
Tip: Subtract about 1/2 inch from the width and height to allow for clearance and smooth operation.
Choose Your Materials
The most common materials for bifold doors are:
- Solid wood: Strong and durable, but heavier and more expensive.
- Plywood: Lightweight and affordable; good for painted doors.
- MDF (Medium Density Fiberboard): Smooth and easy to paint, but can swell if exposed to moisture.
- Pre-made panels: Can save time, but may limit customization.
For closets and bedrooms, lightweight plywood or hollow-core panels are usually fine. For bathrooms, avoid MDF unless it’s rated for humidity.
Select The Right Hardware
Bifold door hardware includes:
- Top and bottom tracks
- Pivot brackets
- Hinges
- Pull handles
- Door aligners
Quality hardware makes a huge difference. Cheap hardware can lead to sticking, wobbling, or doors popping off the track. Brands like Johnson Hardware and Stanley are well-regarded.
Decide On The Door Style
Think about your home’s style and where the doors will be installed. Louvers add ventilation (good for laundry rooms), while glass panels let in light but may need safety film. Solid panels offer privacy.
Tools And Materials You’ll Need
Having the right tools on hand makes this project much easier. Here’s what you’ll need:
- Tape measure
- Circular saw or table saw
- Power drill and bits
- Screwdriver (manual or powered)
- Chisel
- Hammer or mallet
- Level (2-foot and 4-foot)
- Carpenter’s square
- Wood glue
- Wood screws
- Sandpaper (120 and 220 grit)
- Paint or stain (optional)
- Paintbrush or roller
Safety gear: Always wear safety glasses when cutting or drilling. Use ear protection if your saw is loud, and a dust mask when sanding.
Making Bifold Doors: Step-by-step Guide
This section covers each stage in detail, so you can follow along easily. We’ll focus on a two-panel bifold door, which is the most common type for closets and pantries.
Step 1: Cut And Prepare The Door Panels
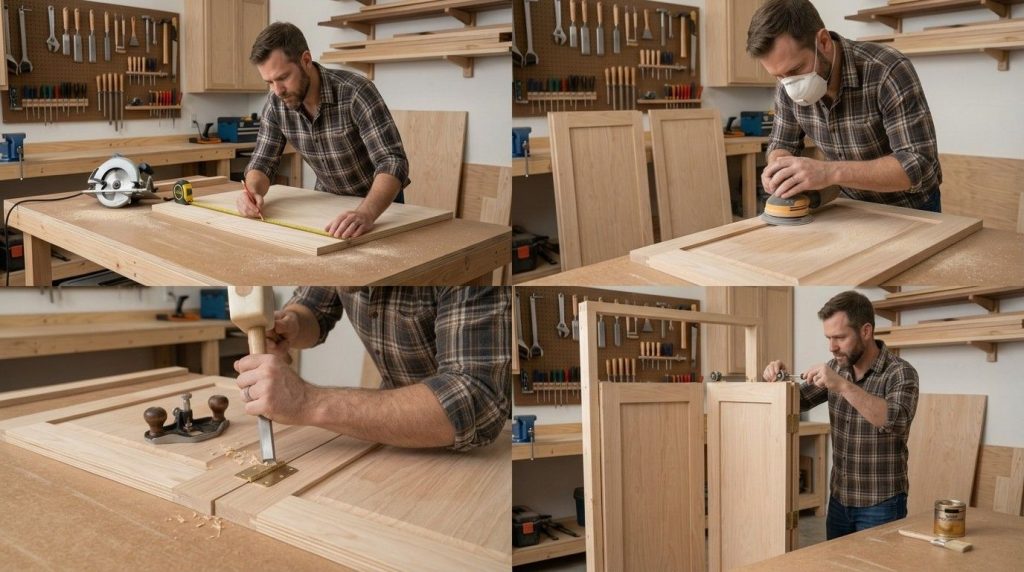
Start by cutting your panels to size. If you’re making a four-panel setup (two panels per door), divide the total width by two, then subtract 1/8 inch from each panel for clearance. For example, if your finished opening is 48 inches wide, each panel should be about 23-7/8 inches wide.
Use a circular saw for straight cuts, or a table saw for more precision. Sand the edges smooth.
If you want to add a design—like shaker-style trim or louvers—now is the time to do it.
Step 2: Join Panels With Hinges
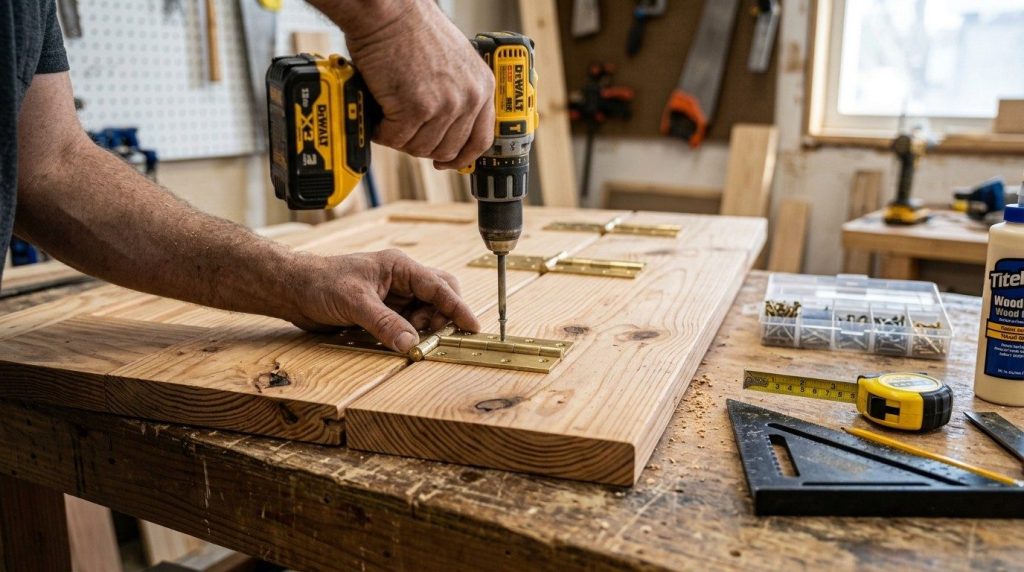
Lay the panels face down, side by side, with about a 1/8-inch gap between them. Attach three butt hinges evenly spaced along the long edge. Mark the position with a pencil, then use a chisel to recess the hinge leaves slightly for a flush fit.
Screw the hinges in place. Open and close the panels to check movement—they should fold smoothly without binding.
Common mistake: Overtightening hinge screws can strip them out or cause the panels to bind. Tighten just enough so the hinge is secure.
Step 3: Install The Top And Bottom Pivot Hardware
Most bifold door kits include a top pivot bracket, bottom pivot bracket, and a track. Follow the instructions from your hardware kit closely. Usually, you’ll:
- Drill a hole at the top and bottom corner of the first panel for the pivot pins.
- Attach the corresponding brackets to the door frame.
- Insert the pins and check that they rotate smoothly.
Install the guiding roller on the opposite top corner, which keeps the door moving along the track.
Tip: Lay out all hardware before installation to make sure you have every part.
Step 4: Mount The Track
Cut the track to fit your door opening, if necessary. Use a hacksaw for metal tracks. Screw the track to the top of the opening, making sure it’s centered and level.
Slide the pivot hardware and guide roller into the track before attaching it to the frame. This step is easier before the track is screwed in place.
Step 5: Hang The Doors
With a helper if possible, lift the doors into position. Insert the bottom pivot pin into the floor bracket, then tilt the doors up and insert the top pivot into the ceiling bracket. Guide the roller into the track slot.
Open and close the doors to test for smooth operation. Adjust the pivot brackets as needed to ensure the doors are plumb (vertical) and even.
Step 6: Attach Door Pulls And Aligners
Mark the position for the door pulls—usually about 36 inches from the floor for closets. Drill pilot holes and screw in the pulls.
If your doors meet in the middle, install a door aligner at the top or bottom to keep them flush when closed.
Case Study: One homeowner in New Jersey used high-quality ball-bearing rollers instead of the cheap plastic ones that came with their kit. The doors operated smoothly for years, and the extra investment (about $15 more) paid off in fewer repairs and less frustration.
Step 7: Finish The Doors
Fill any screw holes or dents with wood filler. Sand all surfaces smooth with 220-grit sandpaper. Wipe off dust before painting or staining.
Apply two coats of paint or stain, sanding lightly between coats for the best finish. Allow plenty of drying time before using the doors.
Comparing Diy Bifold Doors Vs. Pre-made Kits
It’s natural to wonder if making bifold doors yourself is worth the effort. Here’s a quick side-by-side comparison:
| Feature | DIY Bifold Doors | Pre-Made Kits |
|---|---|---|
| Customization | High (any size, style, material) | Limited to standard sizes/styles |
| Cost | Lower if you have tools | Higher (includes labor, packaging) |
| Time Investment | 8–12 hours (includes finishing) | 2–3 hours (mainly installation) |
| Skill Required | Intermediate DIY | Basic DIY |
| Durability | Variable (depends on material) | Usually good, but not always premium |
Key takeaway: If you want a specific look or need a non-standard size, building your own is the best choice. If you value speed or have limited tools, a pre-made kit may suit you better.
Common Mistakes To Avoid
Even experienced DIYers can make errors with bifold doors. Here are the most frequent mistakes:
- Measuring incorrectly. Double-check all measurements. A 1/4-inch error can mean doors that won’t fit.
- Using cheap hardware. Low-quality tracks and rollers often jam or wear out quickly.
- Skipping pilot holes. Always drill pilot holes to avoid splitting wood.
- Forgetting clearances. Leave enough gap at the top, bottom, and between panels for smooth operation.
- Ignoring alignment. Misaligned doors look sloppy and won’t close properly.
- Not finishing edges. Sand and seal every cut edge to prevent moisture damage and splinters.
Pro tip: Test-fit everything before final assembly. It’s easier to fix mistakes before painting or staining.
Safety Considerations
Safety is often overlooked in home projects. Here’s how to keep your project safe:
- Wear safety glasses when cutting, drilling, or sanding.
- Use a dust mask when sanding MDF or plywood.
- Make sure your work area is well lit and clear of clutter.
- Never force a tool—let the saw or drill do the work.
- Secure panels when cutting to prevent kickback.
If your project involves electrical wiring (for example, moving a light switch or outlet), call a licensed electrician. The same goes for structural changes—never cut into a load-bearing wall without a professional’s advice.
Advanced Tips For A Pro-level Finish
Experienced homeowners and carpenters use a few tricks to make bifold doors really stand out:
- Recess the hinges for a flush, professional look.
- Add a thin rubber door sweep at the bottom to block dust in closets.
- Use European-style hidden hinges for a modern touch (requires precise drilling).
- For mirrored or glass panels, apply a safety film to prevent shattering.
- Paint hardware to match your room for a custom, high-end look.
Non-obvious insight: If your floor is uneven, you may need to shim the bottom pivot bracket to keep the doors plumb. A simple plastic shim or even a coin can work wonders and save hours of frustration.
When To Call A Professional
Most bifold door projects are within reach for a confident DIYer, but there are times when hiring a pro is smarter:
- If your opening is out of square (very crooked), a pro can re-frame it.
- For very large or heavy doors (over 80 inches tall or 30 inches wide per panel), pro installation ensures safety and longevity.
- If your home is historic, modifying openings without damaging trim or plaster is tricky.
- If you’re not comfortable with saws or drills, or don’t have the right tools.
A skilled carpenter can often install bifold doors in less than half a day, with perfect results.
Real-world Example: Diy Bifold Closet Doors
A homeowner in Dallas wanted to update their bedroom closet. The old sliding doors were always off-track. After measuring carefully, they built new bifold doors from birch plywood, painted them bright white, and installed brushed nickel pulls. The total cost was under $150—not counting tools—compared to $400 for a custom order.
They had to adjust the bottom pivot bracket with a shim to account for a sloping floor. The finished doors opened smoothly and added value to the room. This project shows that with careful planning and attention to detail, homeowners can achieve professional results.
Maintenance And Troubleshooting
Bifold doors need regular maintenance to stay in top shape:
- Lubricate the track with silicone spray every six months.
- Tighten all screws and hardware yearly.
- If doors stick, check for debris in the track and vacuum it out.
- If the panels sag, adjust the top pivot bracket.
- Repaint or touch up as needed, especially in high-humidity areas.
If you ever notice a door coming off the track, stop using it until you’ve fixed the problem. For bent or broken tracks, replacement is usually easier than repair.
Popular Bifold Door Styles And Trends
Bifold doors aren’t just for closets anymore. Some popular styles include:
| Style | Best For | Notes |
|---|---|---|
| Louvered | Laundry, utility rooms | Allows airflow, hides appliances |
| Shaker | Bedrooms, pantries | Classic look, easy to clean |
| Glass-paneled | Room dividers, offices | Lets in light, modern feel |
| Mirrored | Bedrooms, bathrooms | Makes rooms look larger |
| Barn-style | Living rooms, kitchens | Rustic, sliding or folding |
Trend alert: Painted bifold doors in bold colors (like navy blue or forest green) are popular for adding personality to a room. Mixing wood and glass panels creates a custom look.
Environmental Considerations
If you want a more eco-friendly project, consider:
- Using FSC-certified wood (from sustainable forests)
- Choosing low-VOC paints for better indoor air quality
- Repurposing old doors or panels
- Recycling scrap wood and hardware
Building your own doors lets you control the materials and reduce waste—something mass-produced doors can’t always offer.
Frequently Asked Questions
How Much Does It Cost To Build Bifold Doors?
The cost varies by material and hardware, but most DIY bifold doors for a standard closet run between $100 and $250. Solid wood is more expensive, while plywood or MDF is cheaper. If you already own tools, you’ll save more.
Can I Install Bifold Doors On Carpet?
Yes, but you may need to trim the bottom of the doors slightly for clearance. Use a track system that mounts to the door frame, not the floor, to avoid carpet interference.
What’s The Best Material For Bathroom Bifold Doors?
For bathrooms, use moisture-resistant materials like PVC, fiberglass, or sealed solid wood. Avoid standard MDF, which can swell and warp when exposed to humidity.
How Do I Fix Bifold Doors That Won’t Stay Closed?
Check the door aligner or magnetic catch—these keep the doors closed. Adjust the aligner or replace it if worn. Make sure the doors are plumb and the track is level.
Where Can I Find Quality Bifold Door Hardware?
You can buy hardware at home centers, but for better quality and more options, check specialty suppliers. One good source is Johnson Hardware, which offers durable tracks, pivots, and rollers for bifold doors.
Adding bifold doors is a rewarding project that can transform a space—whether you’re updating a closet, dividing a room, or just looking for a new DIY challenge. With the right preparation, tools, and attention to detail, you’ll enjoy doors that look great and work smoothly for years to come.