Your Trusted Source for Home Fixes & Guides

How to Make Oak Kitchen Cabinets Look Modern: Expert Tips

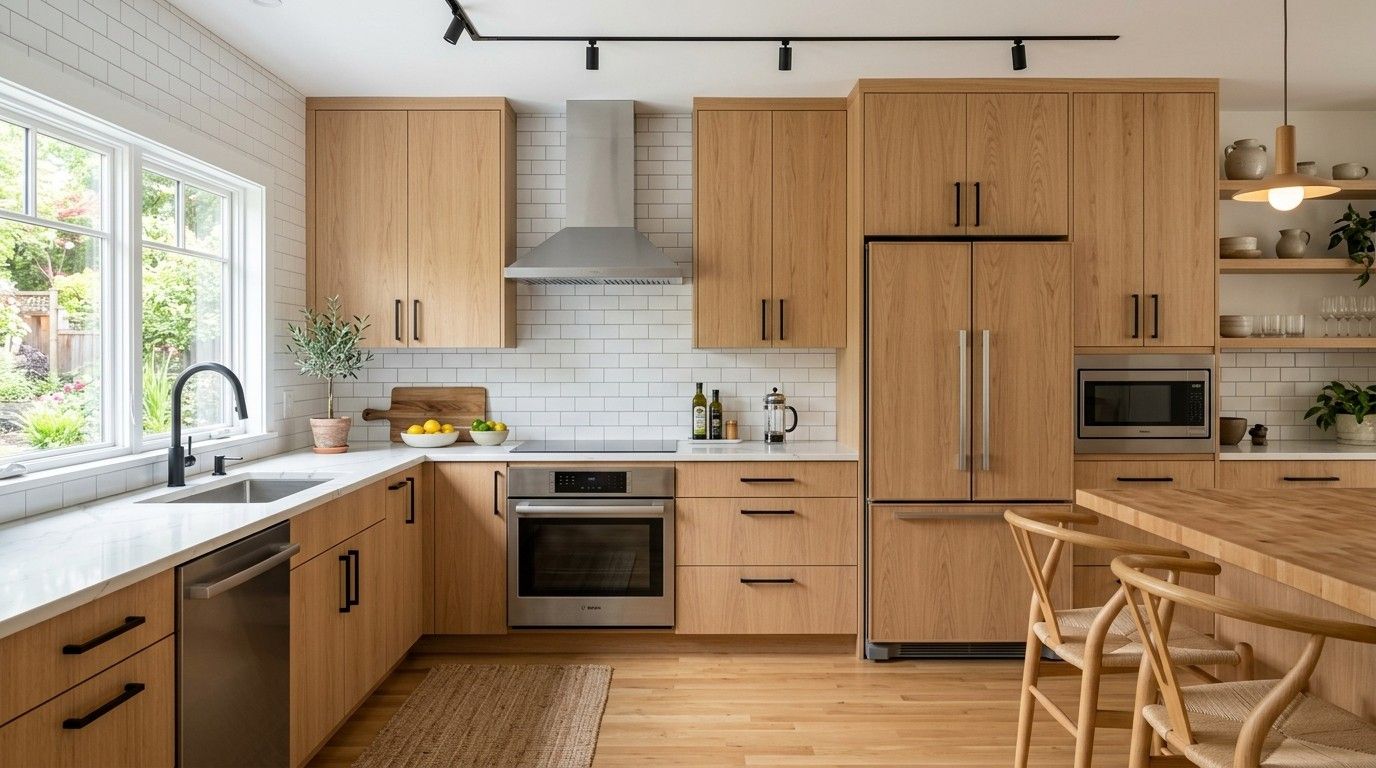
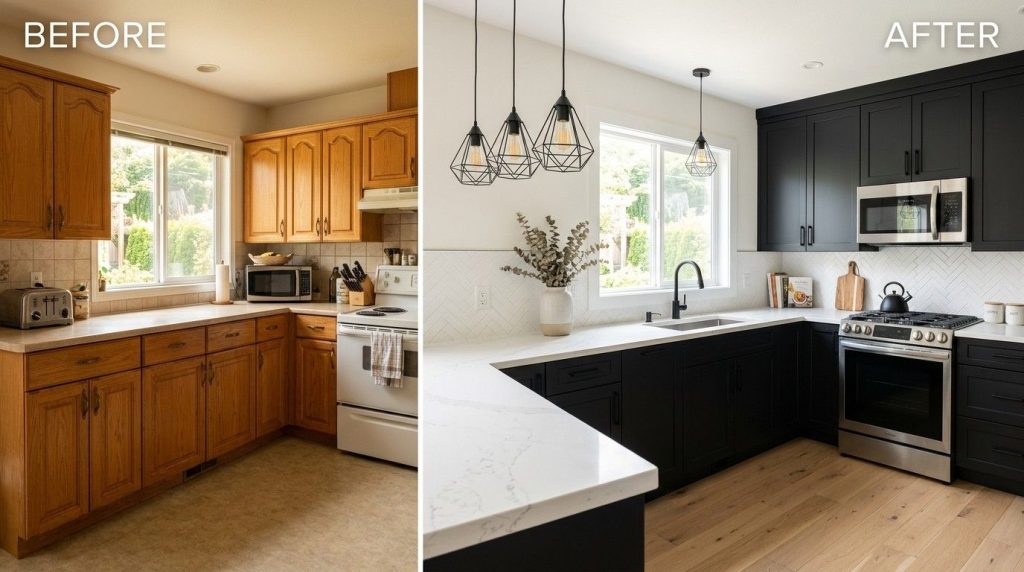
How to Make Oak Kitchen Cabinets Look Modern is a common question for homeowners who want to refresh an outdated kitchen without the cost of a full renovation. If you’re wondering how to make oak kitchen cabinets look modern, simple updates like new paint, stylish hardware, improved lighting, and complementary décor can transform your space into a fresh, contemporary kitchen while keeping your existing cabinets.
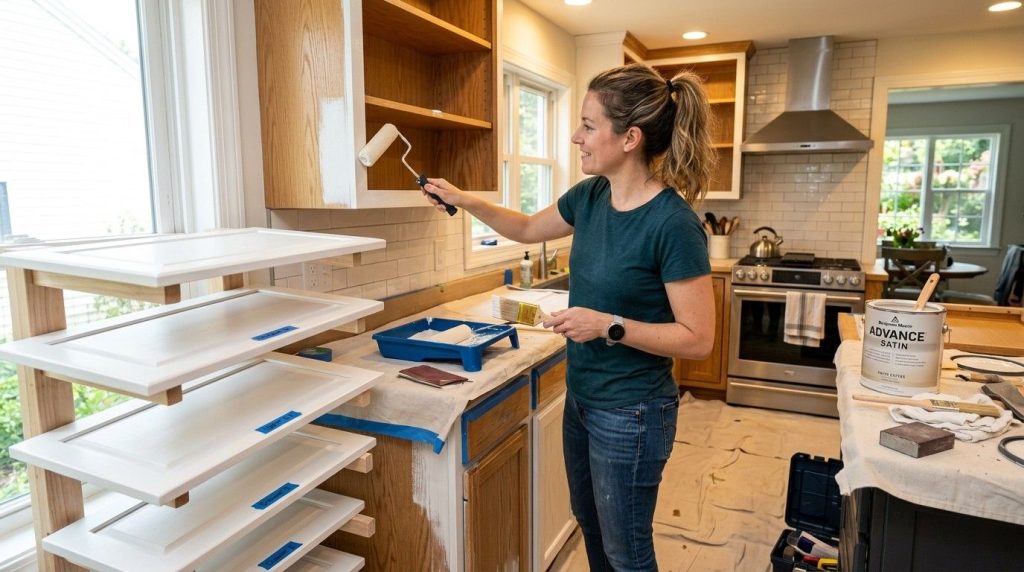
With some thoughtful updates, you can transform dated oak cabinets into a stunning, contemporary feature. I’ve helped dozens of families revamp their kitchens—often on a tight budget—and I’ll walk you through the best strategies, common mistakes, and smart upgrades that really make a difference.
If you want your kitchen to feel brighter, more open, and right on-trend, read on for practical, step-by-step advice.
Why Oak Cabinets Look Dated (and Why That’s Changing)
Oak cabinets became popular in the late 20th century. Their honey-gold finish and heavy grain were stylish then, but today’s trends lean toward lighter, sleeker, and more minimal designs. Here’s what usually makes oak cabinets feel old-fashioned:
- Ornate details like raised panels and heavy moldings
- Yellow or orange tones in the wood stain
- Chunky hardware that screams “builder-grade”
- Darker finishes that absorb light and make the room feel smaller
But here’s the twist: oak is making a comeback in modern design. Designers now pair it with light colors, sleek hardware, and open layouts. The key is to work with the oak’s natural beauty—just update the way it’s presented.
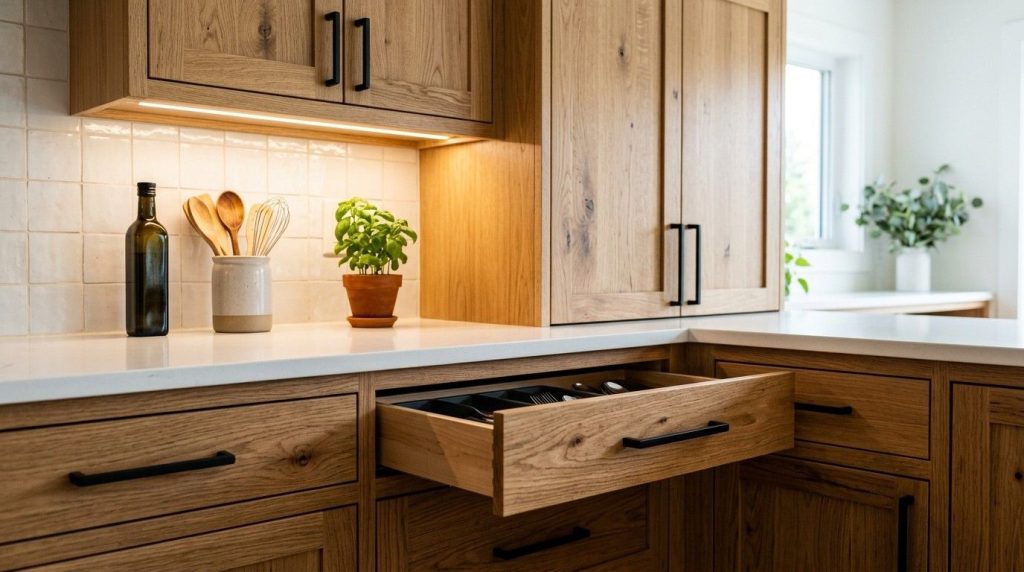
What’s also changing is how oak is used. Instead of covering every surface in matching wood, designers highlight oak in small doses. For example, you might see a modern kitchen with oak lower cabinets and white uppers, or just an oak island as a centerpiece.
When oak is balanced with lighter finishes and simple shapes, it feels fresh again. Even high-end showrooms are showing off rift-sawn and whitewashed oak in new ways.
One overlooked detail: modern oak isn’t always golden. Muted stains, matte sealers, and soft gray washes can make the same wood look totally different. If you appreciate real wood but dislike the “golden oldie” look, you’re not alone—today’s stains and finishes open up new options.
Assessing Your Oak Cabinets: What Can And Can’t Be Changed
Before you start, take a close look at your cabinets. Are they solid wood or veneered? Is the wood in good shape? Are the doors and drawers working smoothly?
What you can change easily:
- Color (paint or stain)
- Hardware (handles and knobs)
- Hinges (swap for soft-close)
- Decorative trim and moldings
- Glass inserts or open shelving
What’s harder or more expensive:
- Cabinet door style (replacing doors costs more)
- Cabinet layout (moving cabinets or changing size)
If your cabinets are solid oak and structurally sound, you have a great foundation for updates.
If you’re unsure about the material, look inside the cabinet doors or at unfinished areas. Solid wood will show consistent grain, while veneer might show a layered edge. Even if your cabinets are veneered, you can still paint or re-stain them—just be gentler when sanding.
Loose hinges, sticking drawers, or water damage may need repair before you start. Spending an hour tightening screws and cleaning runners is worth it. If you plan to keep your cabinets for years, consider replacing worn-out drawer slides for a smoother feel.
A hidden tip: sometimes, the inside of cabinets is darker than the doors. If you replace doors or add glass inserts, you may want to paint or line the cabinet interiors for a cleaner look.
Step 1: Choose Your Modern Look
Modern doesn’t mean one thing. Do you want your kitchen to feel sleek and minimalist, or warm and inviting? Here are a few trending styles:
- Scandinavian Modern: Light colors, matte finishes, simple hardware.
- Transitional: Mix of classic wood with modern touches—think painted lowers, wood uppers.
- Mid-Century Modern: Clean lines, flat-front doors, brass hardware.
- Industrial Modern: Black accents, open shelving, concrete or stone countertops.
Decide on your vibe before you start. Collect photos or create a mood board. This helps prevent mismatched choices later.
If you’re struggling to choose, try this: look at your favorite rooms in magazines or online. Notice what colors, materials, and shapes repeat. Maybe you love the look of white and wood, or maybe you prefer bold contrasts. Save images to your phone, or print them out and tape to your cabinets. Living with your ideas for a few days can help you make confident decisions.
Another smart move: consider your home’s overall style. A modern kitchen can look out of place in a very traditional house, so aim for updates that blend with the rest of your space. Transitional design, which mixes old and new, often works well for homes with classic features.
Step 2: Lighten And Brighten
The fastest way to modernize oak cabinets is to lighten the look. Here’s how:
Painting Oak Cabinets
Paint is the single most effective update, but it requires patience and careful prep.
Supplies Needed:
- Degreaser (like TSP)
- Sandpaper (120-220 grit)
- Wood filler (for deep grain)
- High-quality primer (stain-blocking)
- Paint (enamel or cabinet-specific)
- Foam roller and angled brush
Steps:
- Remove all doors, drawers, and hardware.
- Clean surfaces thoroughly—grease will ruin your finish.
- Lightly sand to remove gloss and smooth the grain.
- Fill heavy grain if you want a super-smooth finish.
- Prime with a stain-blocking primer.
- Apply 2-3 coats of paint, sanding lightly between coats.
Pro tip: Use a sprayer for the smoothest finish, but a foam roller works well on flat doors.
Color Choices:
- White: Brightens and opens up the space. Works with any style.
- Soft gray: Feels modern but warmer than white.
- Bold navy or deep green: Creates drama, works best on lower cabinets.
Common mistake: Skipping prep. Paint will peel if you don’t clean and sand well.
A non-obvious tip: consider a two-tone look. Painting upper cabinets white and lowers a deeper color (like navy or charcoal) can add interest and make ceilings feel higher. If you want to experiment, paint just an island or a single bank of cabinets first.
Staining Oak Cabinets
If you prefer to keep the wood grain, consider a gray or light brown stain. This neutralizes orange tones and adds a modern edge.
Steps:
- Strip old finish using a gentle remover.
- Sand thoroughly—oak grain can be deep.
- Apply wood conditioner (prevents blotching).
- Stain with a foam brush or rag; wipe off excess.
- Seal with a clear, matte polyurethane.
Safety note: Always work in a ventilated area and wear gloves when handling chemicals.
If you want a “driftwood” or weathered oak look, apply a white or gray wash after staining. This technique highlights the grain and can soften bright gold tones. Remember: staining takes practice. Always test your color on a hidden spot before committing.
Case Study: The Smith Family’s Kitchen
The Smiths had classic oak cabinets with a honey finish. They wanted a Scandinavian look but didn’t want to lose all wood character. Instead of paint, they stripped the old finish and used a light gray wash stain. The result? Their kitchen felt twice as big, and the natural grain became a feature, not a flaw. Total cost: under $400.
Another example: a client wanted a rustic-modern vibe, so we stained the oak with a weathered gray, swapped hardware for matte black, and added floating shelves. The kitchen felt brand new, but the charm of oak was still there.
Step 3: Update Hardware For Instant Impact
Swapping out old hardware is an easy, affordable way to change your kitchen’s feel. Here’s what to look for:
Modern Hardware Trends
- Matte black: Sharp, graphic lines. Works with any cabinet color.
- Brushed brass: Adds warmth and a bit of luxury.
- Simple bar pulls: Minimal and timeless.
- Hidden edge pulls: For a seamless, ultra-modern look.
Choosing The Right Size And Placement
Big, chunky knobs look old-fashioned. Go for slender bar pulls or simple T-knobs.
Tip: If your old hardware had two holes, measure carefully before buying new pulls. Some modern handles are designed to cover existing holes.
If you want a subtle update, try placing handles horizontally on drawers and vertically on doors. This simple switch gives a more custom, designer look. Also, don’t forget about hinges—visible brass or painted hinges can date your kitchen. Hidden or soft-close hinges are a worthwhile upgrade.
Hardware Comparison
Here’s a quick overview of popular finishes:
| Finish | Modern Appeal | Best With |
|---|---|---|
| Matte Black | High | White, gray, or wood stains |
| Brushed Brass | Medium | Dark blues, greens, or walnut stains |
| Polished Chrome | Medium | Cool-toned paints |
| Oil-Rubbed Bronze | Low | Traditional styles |
Common mistake: Mixing too many metal finishes. Stick to one or two for a unified look.
A detail beginners miss: the size of hardware matters. Small handles on large doors look cheap, while oversized bar pulls can make old cabinets feel more modern. When in doubt, bring a door to the store and test different options in person.
Step 4: Rethink Doors And Drawer Fronts
If your cabinet doors are highly detailed (raised panels, arches), they’ll always feel a bit traditional. You have two main options:
1. Replace Doors Only
Swapping doors is less expensive than full cabinets. Flat-front or “slab” doors look very modern.
- Cost: $30–$100 per door, depending on material.
- Can be installed by a skilled DIYer, but a pro will ensure a perfect fit.
You can also consider ready-to-assemble (RTA) doors, which come pre-finished in popular colors. This option lets you keep your cabinet boxes but completely change the visible style. For a softer look, shaker-style doors (with a flat center panel) are popular and timeless.
2. Modify Existing Doors
If your budget is tight, you can fill panel grooves with wood filler and sand flush, then paint for a flat look. It takes time, but it’s cheaper than new doors.
Safety note: Use a mask when sanding to avoid breathing in dust.
Another low-cost trick: add simple trim or overlay panels to create a shaker look on your existing doors. Many DIYers use thin wood strips and strong glue, then paint everything for a seamless finish.
Door Style Comparison
| Door Style | Modern Level | DIY Friendly |
|---|---|---|
| Slab (Flat) | High | Medium |
| Shaker | Medium-High | High |
| Raised Panel | Low | High |
A non-obvious tip: you don’t have to do all doors at once. Try updating just a bank of upper cabinets or an island to see how you like the new style before committing.
Step 5: Add Open Shelving Or Glass Inserts
A few open shelves or glass-front cabinets can break up long runs of oak and add airiness.
- Replace a couple of upper cabinet doors with simple glass inserts.
- Remove doors altogether and paint the inside for a pop of color.
Pro tip: Limit open shelving to everyday items. Too much open space can look cluttered.
If you want a more custom look, consider frosted or textured glass for inserts. It hides clutter but still opens up the space. Floating wood shelves, especially in a matching or contrasting stain, add a modern touch and are easy to install above counters or near the sink.
Another idea: use open shelving for plants, cookbooks, or pottery to bring color and personality into the kitchen. Just remember, open shelving is best for items you use often, so they don’t collect dust.
Step 6: Modernize Surrounding Elements
Even if you update cabinets, old countertops or dated backsplashes can hold back your kitchen’s look. Here’s how to complete the transformation:
Walls
- Bright white paint: Instantly lifts and modernizes.
- Soft grays or pale blues: Pair well with light oak stains.
If your kitchen lacks natural light, choose a cool white with a slight blue or gray undertone. This makes the space feel cleaner and bigger.
Backsplash
- Subway tile: Classic and modern. Lay it in a herringbone or vertical pattern for extra style.
- Hex tile or geometric patterns: Very current, adds interest.
Don’t be afraid to use peel-and-stick tiles for a budget-friendly refresh. They’re easy to install and remove if you want to change styles later.
Countertops
- Quartz or solid-surface: Sleek, durable, and comes in many colors.
- Butcher block: Warm and affordable; pairs well with painted cabinets.
If you love the look of natural stone but not the price, consider laminate in a marble pattern. It’s much more affordable and modern laminates look surprisingly realistic.
Cost-saving tip: If new counters aren’t in the budget, try a high-quality countertop paint kit for a temporary refresh.
Flooring
- Large-format tile or light wood: Makes the space feel bigger.
- Avoid dark or red-toned floors, which can make oak look more orange.
Another hidden upgrade: replace old, yellowed baseboards or thresholds with crisp white for a clean, finished look.
Step 7: Lighting Changes Everything
Lighting is often overlooked, but it can instantly make your cabinets feel fresh.
- Under-cabinet lighting: LED strips are easy to install and make counters pop.
- Pendant lights: Choose simple, geometric shapes for a modern edge.
- Recessed lighting: Brightens the whole room and removes shadows.
Common mistake: Keeping old, yellowed light fixtures. Swapping them out is an easy win.
A detail most people miss: the color temperature of your bulbs matters. Choose “daylight” (5000K) LEDs for a crisp, modern look—“warm white” can make oak look more yellow or orange.
If you’re renting or want a no-wiring solution, battery-powered puck lights or adhesive LED strips are a game-changer. Place them under cabinets, inside glass doors, or even inside drawers.
Step 8: Remove Heavy Trim And Add Simple Touches
Old oak cabinets often have ornate crown molding or corbels. Removing these instantly simplifies the look.
- Replace with a plain, slim trim.
- Fill and paint over old screw holes.
- Install soft-close hinges for a higher-end feel.
Safety note: Use caution when removing old trim—there may be nails or splinters.
If you want to add a designer detail, install a small rail for hanging utensils or herbs under an open shelf. It’s functional and modern.
Step 9: Declutter And Style Thoughtfully
Modern kitchens are about simplicity and function.
- Only display a few items on counters.
- Use matching containers or baskets inside open shelves.
- Hide small appliances when not in use.
Don’t forget about drawer organizers or pull-out trays—these small upgrades make your kitchen easier to use and keep clean. A clutter-free space lets your new cabinet look shine.
A detail many miss: group similar items (like all wooden spoons in one crock) for a look that feels intentional, not random.
Step 10: When To Call A Pro
While many of these updates are DIY-friendly, there are times to call a licensed professional:
- If you’re changing cabinet layout or moving plumbing/electrical.
- For countertop installation (especially stone or quartz).
- Installing heavy or specialty lighting fixtures.
Pro insight: Painting cabinets can be a big job. If you’re not confident, a local painter with cabinet experience will deliver a flawless finish—often in less time.
Some pros offer “cabinet refinishing” services where they spray doors off-site and reassemble quickly, minimizing kitchen downtime.
Cost Breakdown: What To Expect
Here’s a quick summary of typical costs (as of 2026):
| Upgrade | DIY Cost Range | Pro Cost Range |
|---|---|---|
| Paint Cabinets | $150–$500 | $1,200–$3,000 |
| New Hardware | $50–$300 | $200–$500 |
| Replace Doors | $500–$2,500 | $1,500–$5,000 |
| Countertops | $300–$1,500 | $1,500–$4,000 |
| Backsplash | $200–$600 | $800–$2,000 |
Budget tip: tackle one element at a time. Start with hardware or lighting, then save up for bigger upgrades. Each small change adds up to a major transformation.
Practical Tips And Common Mistakes To Avoid
Updating oak cabinets is about details and discipline. Here’s what I’ve learned over 20 years of DIY and professional work:
- Don’t skip prep: Rushing the cleaning, sanding, or priming steps when painting leads to peeling and chips.
- Test colors first: What looks good in a photo might not work in your lighting. Paint a sample board and view it at different times of day.
- Don’t mix styles: If you go modern on cabinets, don’t keep super-traditional decor elsewhere.
- Invest in good hardware: Cheap handles can ruin the feel of even beautifully painted cabinets.
- Use the right paint: Cabinet-specific enamel is more durable than wall paint.
- Avoid trendy colors on all cabinets: A bold color looks best on an island or lower cabinets, not everywhere.
- Work safely: Always ventilate, especially when using chemicals or sanding.
Another mistake: not allowing enough cure time for paint or stain. Even if cabinets feel dry, paint can take weeks to fully harden. Be gentle with doors and drawers for the first month.
If you’re painting, remove cabinet doors and label each one. This prevents confusion during reinstallation.
Non-obvious Insights Most Beginners Miss
- The grain matters. Oak has a strong grain pattern that shows through paint. If you want a perfectly smooth look, budget time for grain filling, or embrace a little texture as “character.”
- Lighting reveals everything. What looks good under dim light can show flaws under bright LEDs. Always check your prep work with strong lighting before painting.
- Hinges can date your cabinets. Even if you paint and replace handles, shiny brass hinges from the 80s will stand out. Swap for soft-close, hidden hinges if possible.
- Glass inserts make a bigger difference than open shelving. They break up heavy wood visually but keep dust out of your dishes.
- Mixing door styles can work. Replacing just a few doors with glass or flat panels while keeping others is a designer trick to modernize on a budget.
Also, remember: the way you style your kitchen matters as much as the cabinets themselves. Clean lines, grouped objects, and coordinated colors create a sense of order.
Case Study: The Johnson Remodel
The Johnsons had a small kitchen with classic oak cabinets and almost no natural light. They painted the uppers white, the lowers deep blue, added matte black bar pulls, and installed a white hex tile backsplash. They skipped new countertops but added under-cabinet lighting.
Result: The room felt twice as big, and neighbors thought they’d spent $15,000. Total cost: under $2,000 and two weekends of work.
For another twist, I’ve seen families keep the original oak but add a modern runner rug, new stools, and statement pendant lights—sometimes, even small touches like these can completely change the room’s energy.
Frequently Asked Questions
How Do I Make Oak Cabinets Look Modern Without Painting Them?
You can refinish with a lighter or neutral stain, add modern hardware, remove heavy trim, and update lighting and backsplashes. Adding glass inserts or open shelves also helps break up the wood. Another idea is to introduce new colors with wall paint, rugs, or bold accessories. Sometimes, updating the background is enough to let oak cabinets blend seamlessly into a modern look.
Is It Hard To Paint Oak Cabinets Myself?
It’s not easy, but it’s doable for a careful DIYer. The most important steps are thorough cleaning, sanding, and priming. Take your time—plan for several days. If you want a flawless finish, consider hiring a professional. If you’re unsure, practice on a small door or drawer first. This gives you a feel for the process without risking the whole kitchen.
Should I Keep Any Oak Elements Exposed?
Absolutely—natural wood is back in style if the color and grain are modernized. Keeping some open shelving or a wood island can warm up an all-white kitchen. Mixing painted cabinets with some natural oak accents can add depth and interest, especially if you love a layered, designer look.
What’s The Best Modern Hardware For Oak Cabinets?
Matte black or brushed brass bar pulls are the most popular choices. Look for simple, straight lines. Avoid ornate knobs or handles. For a softer look, brushed nickel or stainless steel also work well, especially with gray or blue cabinets.
Where Can I Find More Ideas And Inspiration?
A great resource for kitchen remodeling inspiration is Houzz, where you can see thousands of real-life kitchen updates and save your favorites.
With a little planning and the right updates, your oak kitchen cabinets can go from outdated to outstanding. Focus on color, hardware, and lighting, and don’t be afraid to mix old and new for a look that’s fresh and uniquely yours. If you get stuck or the project feels overwhelming, remember: there’s no shame in calling a professional for that perfect, polished finish. Your kitchen can be the modern, bright heart of your home—without breaking the bank.