Your Trusted Source for Home Fixes & Guides

How to Paint Kitchen Cabinets Without Sanding: Easy Guide

How to Paint Kitchen Cabinets Without Sanding is a practical way to give your kitchen a fresh new look without the mess of traditional prep work. If you’re wondering how to paint kitchen cabinets without sanding, using the right degreaser, bonding primer, and high-quality cabinet paint can deliver a smooth, durable finish. This guide walks you through each step, shares expert tips, and helps you avoid common mistakes for professional-looking results.

Why Skip Sanding?
Most people dread sanding because it’s dusty, tiring, and can damage cabinet surfaces if done wrong. Besides, sanding isn’t always necessary with modern primers and paints designed to stick to slick cabinet surfaces. Skipping sanding saves time, keeps your kitchen cleaner, and reduces the risk of breathing in dust. For homeowners with allergies, young kids, or pets, avoiding sanding is a health win.
But skipping sanding doesn’t mean skipping prep. You must clean, de-gloss, and prime cabinets properly to ensure paint sticks and lasts. With today’s specialty products, you can achieve a smooth, durable finish—no sandpaper required.
Tools And Materials You’ll Need
Before you start, gather your supplies. Here’s a list of essentials for painting cabinets without sanding:
- Degreaser (like Krud Kutter or Dawn dish soap)
- Liquid de-glosser (also called liquid sandpaper)
- High-bonding primer (such as Zinsser Bulls Eye 1-2-3 or Kilz Adhesion)
- Cabinet paint (acrylic, latex, or enamel; look for “cabinet” or “furniture” formulas)
- Paint brushes (synthetic bristle, angled for edges)
- Foam rollers (for smooth surfaces)
- Painter’s tape
- Drop cloths
- Screwdriver (to remove hardware)
- Cleaning cloths
- Disposable gloves
- Mask (for de-glosser fumes)
- Bucket
- Plastic containers (for hardware)
- Fine-grit sanding sponge (optional, for minor touch-ups—not full sanding)
Most of these items are available at home improvement stores. Don’t skip the liquid de-glosser—it’s the secret to skipping sanding.
Step-by-step Guide: Painting Kitchen Cabinets Without Sanding
Painting cabinets without sanding is easy if you follow each step carefully. Here’s how to do it:
1. Prepare Your Kitchen
Clear countertops and remove anything from cabinets. Lay drop cloths to protect floors. Open windows for ventilation. Remove cabinet doors, drawers, and all hardware (handles, hinges, screws). Label each piece or take photos so you can reassemble easily.
Store hardware in labeled containers. This step prevents confusion later.
2. Clean Cabinets Thoroughly
Kitchen cabinets gather grease and dirt. If you skip cleaning, paint won’t stick. Mix a degreaser or dish soap in warm water. Scrub all surfaces—doors, frames, drawer fronts—using a cloth or sponge.
Rinse with clean water and let dry completely. This step is crucial. Even invisible grease can ruin your paint job.
3. Apply Liquid De-glosser
Liquid de-glosser (sometimes called “liquid sandpaper”) removes shine and helps primer stick. Wear gloves and a mask. Pour de-glosser onto a cloth and wipe all surfaces. Follow the product instructions—usually you wipe, let sit for a few minutes, then wipe again with a clean cloth.
Do not rinse with water. Let cabinets dry as directed. This step replaces sanding by chemically roughening the surface.
4. Tape And Protect Surroundings
Use painter’s tape to mask off walls, countertops, and areas you don’t want painted. Cover appliances and sinks with plastic or drop cloths.
5. Prime Cabinets
Primer is key for paint adhesion and durability. Use a high-bonding primer—these are made for slick surfaces like laminate, melamine, or glossy wood.
Stir primer well. Use a brush for edges and corners, and a foam roller for flat areas. Apply a thin, even coat. Let dry as directed (usually 1–2 hours).
For very glossy cabinets or laminate, apply a second coat of primer for best results.
6. Paint Cabinets
Choose a paint made for cabinets or furniture—these resist chipping and are easy to clean. Stir paint well. Apply with a brush for details and a roller for flat surfaces.
Apply thin coats. Thick paint can drip or peel. Let each coat dry fully before adding another (follow paint label directions). Usually, two coats are enough, but you may need three for dark colors or dramatic changes.
7. Let Paint Cure
After painting, let cabinets cure for at least 48–72 hours before reattaching doors, drawers, and hardware. Some paints take up to a week to fully harden. Avoid touching or cleaning cabinets during this time.
8. Reassemble Cabinets
Once paint is fully cured, reinstall hardware and hang doors and drawers. Remove tape and drop cloths. Clean up any drips or mistakes with a damp cloth.
Your kitchen is now refreshed—no sanding required.
Case Study: Homeowner Success Story
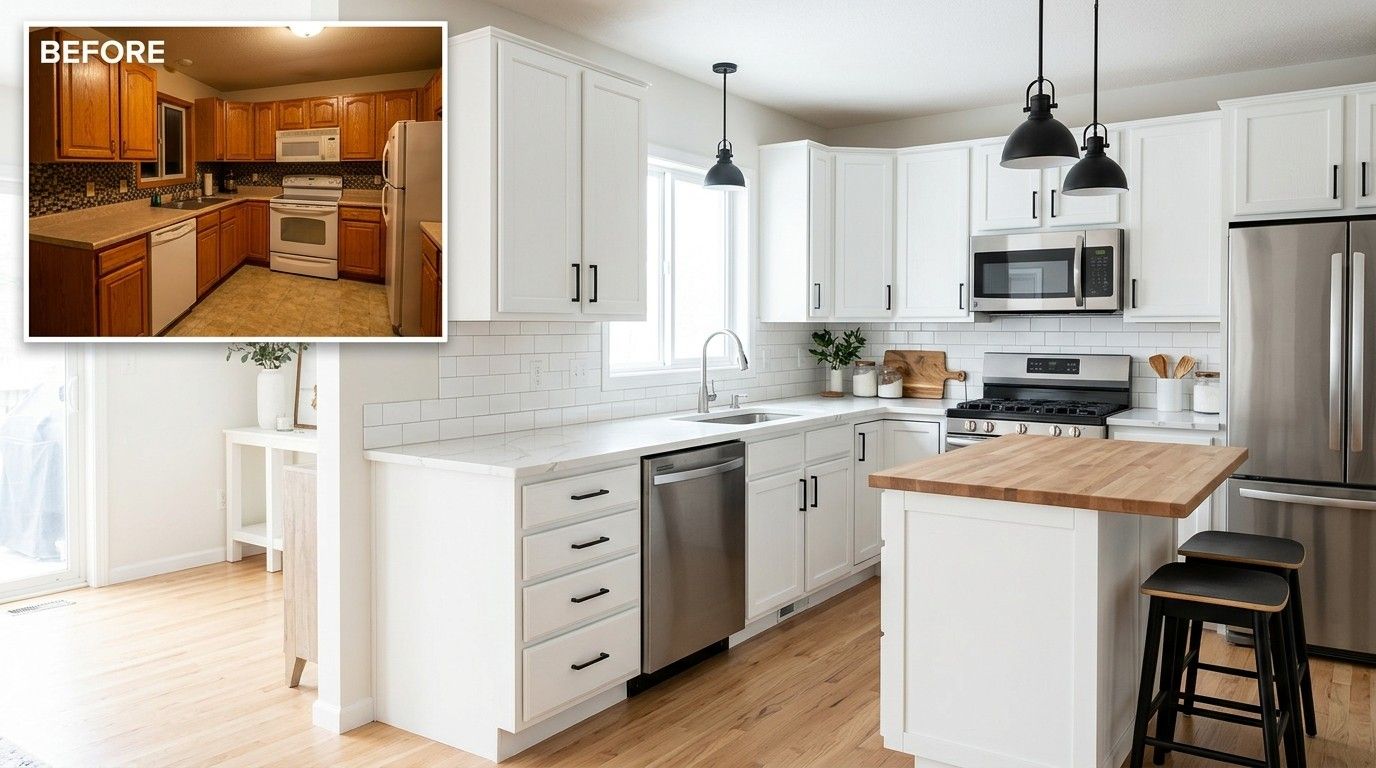
Let’s look at a real-world example. Sarah, a homeowner in Ohio, wanted to update her 1990s oak kitchen cabinets. She dreaded sanding because of asthma and limited time, so she used liquid de-glosser and a high-bonding primer. She followed all steps, took her time with cleaning, and used a cabinet-specific paint.
The results? Her kitchen looked modern and clean, and the finish lasted more than three years without chips or peeling. Sarah’s biggest advice: “Don’t rush the cleaning. That’s where most people mess up!”
This case shows you don’t need expensive tools or pro help. Careful prep, the right products, and patience make all the difference.
Choosing The Right Primer And Paint
There are many primers and paints on the market. Here’s a comparison of popular options, so you can see which fits your needs:
| Product | Type | Best For | Dry Time | Features |
|---|---|---|---|---|
| Zinsser Bulls Eye 1-2-3 | Water-based Primer | Wood, laminate, glossy surfaces | 1 hour | Low odor, easy cleanup |
| Kilz Adhesion | Bonding Primer | Laminate, melamine, tough surfaces | 30 min | Strong bond, blocks stains |
| Benjamin Moore Advance | Cabinet Paint | Wood, MDF, previously painted | 6 hours | Durable, smooth finish |
| Behr Alkyd Semi-Gloss | Enamel Paint | High traffic, easy cleaning | 2 hours | Hard, chip-resistant |
Always check the label for compatibility with your cabinet material. If your cabinets are laminate or melamine, use a primer labeled for “bonding” or “adhesion. ”

Paint Finish: Which To Choose?
Paint finish affects both the look and durability. Here’s a quick comparison:
| Finish | Appearance | Durability | Best For |
|---|---|---|---|
| Matte | Low shine | Less durable | Low-traffic cabinets |
| Satin | Soft sheen | Good durability | Most kitchens |
| Semi-gloss | Medium shine | High durability | High-traffic, easy cleaning |
| Gloss | High shine | Very durable | Modern kitchens, easy wipe |
Semi-gloss is the most popular for kitchen cabinets. It’s easy to clean and resists stains. Satin is a good choice if you want less shine.
Safety Precautions
Painting cabinets is safe if you follow basic precautions:
- Wear gloves when using de-glosser and primer.
- Use a mask and open windows for good ventilation.
- Keep children and pets away from work area.
- Dispose of rags and paint cans properly—many products are flammable.
- If you spill de-glosser, clean up immediately to prevent slips.
If you have allergies or asthma, use water-based products with low VOC (volatile organic compounds). They have less odor and are safer for indoor air.
Common Mistakes And How To Avoid Them
Many DIYers make mistakes that ruin their cabinet paint job. Here are some to watch for:
- Skipping cleaning: Paint won’t stick to greasy cabinets. Always clean first.
- Not using a primer: Primer is essential when skipping sanding.
- Rushing paint coats: Let each coat dry fully. Rushing causes peeling.
- Using the wrong paint: Don’t use wall paint. Cabinet-specific paints last longer.
- Not labeling hardware: Reinstalling doors gets confusing without labels.
- Ignoring ventilation: Paint fumes are strong. Open windows and use fans.
- Applying thick paint: Thin coats look better and dry faster.
- Skipping de-glosser: It’s the secret to skipping sanding.
Learn from others’ mistakes and your project will go smoothly.
When To Call A Professional
Some cabinets need a pro touch. Call a licensed painter if:
- Cabinets have deep scratches, water damage, or peeling veneer.
- You want a custom color or sprayed finish.
- You’re not comfortable with chemicals or tools.
Professional painters have sprayers for ultra-smooth finishes and can fix damage you can’t. If your cabinets are very old or valuable, consult a pro before painting.
How Long Does It Take?
Painting kitchen cabinets without sanding takes less time than traditional sanding, but you still need to plan. Here’s a rough timeline:
| Step | Time Required |
|---|---|
| Remove doors & hardware | 1 hour |
| Clean cabinets | 1–2 hours |
| Apply de-glosser | 30–60 minutes |
| Tape and prep | 30 minutes |
| Prime cabinets | 2–3 hours (including drying) |
| Paint cabinets | 2–4 hours (including drying) |
| Cure paint | 2–7 days |
| Reassemble | 1 hour |
Most homeowners finish in a weekend, but wait several days before heavy use.
Budget: How Much Will It Cost?
DIY cabinet painting is affordable compared to replacement. Here’s a typical breakdown:
- Degreaser & de-glosser: $15–$30
- Primer: $20–$40
- Cabinet paint: $30–$60 (per gallon)
- Brushes & rollers: $10–$20
- Painter’s tape & drop cloths: $10–$20
- Miscellaneous (gloves, containers): $10–$15
Total: $95–$185 For An Average Kitchen
Compare this to professional painting ($1,000–$3,000) or full cabinet replacement ($4,000–$12,000). DIY saves big money.
Expert Tips For A Professional Finish
Want your cabinets to look store-bought? Here are insider tips:
- Use a foam roller for flat surfaces. It leaves fewer marks than a brush.
- Brush edges and corners first, then roll main surfaces for smoothness.
- Work in a well-lit area to spot drips and missed spots.
- Remove doors and paint them horizontally. This prevents drips.
- Let paint cure fully before heavy use—avoid cleaning or handling for at least 72 hours.
- Touch up small chips with leftover paint and a fine brush.
If you want a sprayed finish but don’t own a sprayer, some home improvement stores rent them. Practice on scrap wood before spraying your cabinets.
Diy Vs. Professional Results
DIY cabinet painting can look just as good as pro work if you follow the right steps. The main difference is time and equipment. Pros use sprayers for glass-smooth finishes, but brush and roller can be nearly as good if you apply thin coats and sand lightly between layers (optional).
DIY is best for standard cabinets, simple colors, and homeowners willing to spend a weekend on the project. If you want a custom look or have damaged cabinets, hire a pro.
How To Maintain Painted Cabinets
Once your cabinets are painted, keep them looking great with these tips:
- Clean with mild soap and water; avoid harsh chemicals.
- Wipe spills quickly to prevent stains.
- Use soft cloths, not scrubbers.
- Avoid hanging wet towels or dishcloths on cabinet doors.
- Touch up chips with leftover paint.
Painted cabinets last 3–7 years before needing a touch-up, depending on use.
Eco-friendly Cabinet Painting
If you’re concerned about the environment, choose paints and primers with low VOC. Look for labels like “GreenGuard Certified” or “Low Odor. ” Dispose of old paint and rags at your local hazardous waste center—don’t pour down the drain.
You can also donate leftover paint to community groups or neighbors.
Non-obvious Insights For Beginners
- Labeling hardware: Use numbered stickers or masking tape to mark each door and its matching hardware. This prevents confusion during reassembly and saves hours.
- Testing paint compatibility: Before painting the whole kitchen, test primer and paint on the back of one cabinet door. If it sticks and dries well, you’re good to go.
- Humidity matters: Painting in high humidity can slow drying and cause bubbles. Try to paint on a dry day, or use a dehumidifier.
These tips are often missed by beginners but make a big difference in results.
Recommended Brands And Resources
Some of the best cabinet paints and primers are:
- Benjamin Moore Advance
- Sherwin-Williams ProClassic
- Behr Alkyd Semi-Gloss
- Zinsser Bulls Eye 1-2-3
- Kilz Adhesion
For more details on cabinet painting and product reviews, check out This Old House.

Frequently Asked Questions
Can I Paint Over Laminate Cabinets Without Sanding?
Yes, you can paint over laminate cabinets if you use a bonding primer and liquid de-glosser. Clean thoroughly and follow all prep steps. Bonding primers are made to stick to slick surfaces.
What If My Cabinets Have Chips Or Damage?
Small chips can be filled with wood filler or putty before painting. For deep damage or peeling veneer, sanding may be needed. If damage is extensive, call a licensed professional.
How Long Does Painted Cabinet Finish Last?
A properly painted cabinet finish lasts 3–7 years. Durability depends on the paint used, prep quality, and kitchen traffic. Touch up chips as needed to extend life.
Is Painting Cabinets Without Sanding Safe For Kids And Pets?
Yes, if you use water-based, low-VOC paints and keep the area ventilated. Keep kids and pets out of the kitchen while painting and drying. Dispose of chemicals safely.
Can I Change Cabinet Color From Dark To Light?
You can go from dark to light colors, but you may need extra coats of primer and paint. Use a white or light gray primer for best results. Thin, even coats prevent streaks.
Refreshing your kitchen cabinets without sanding is a smart, affordable DIY project that gives big results. With careful prep, the right products, and a little patience, you’ll enjoy a beautiful new kitchen—and skip the mess of sanding. If you ever feel unsure or run into trouble, don’t hesitate to call a pro.
Your kitchen is the heart of your home—make it shine!