Your Trusted Source for Home Fixes & Guides

How to Get Rid of Mold in a Bathroom: Causes, Cleaning and Prevention

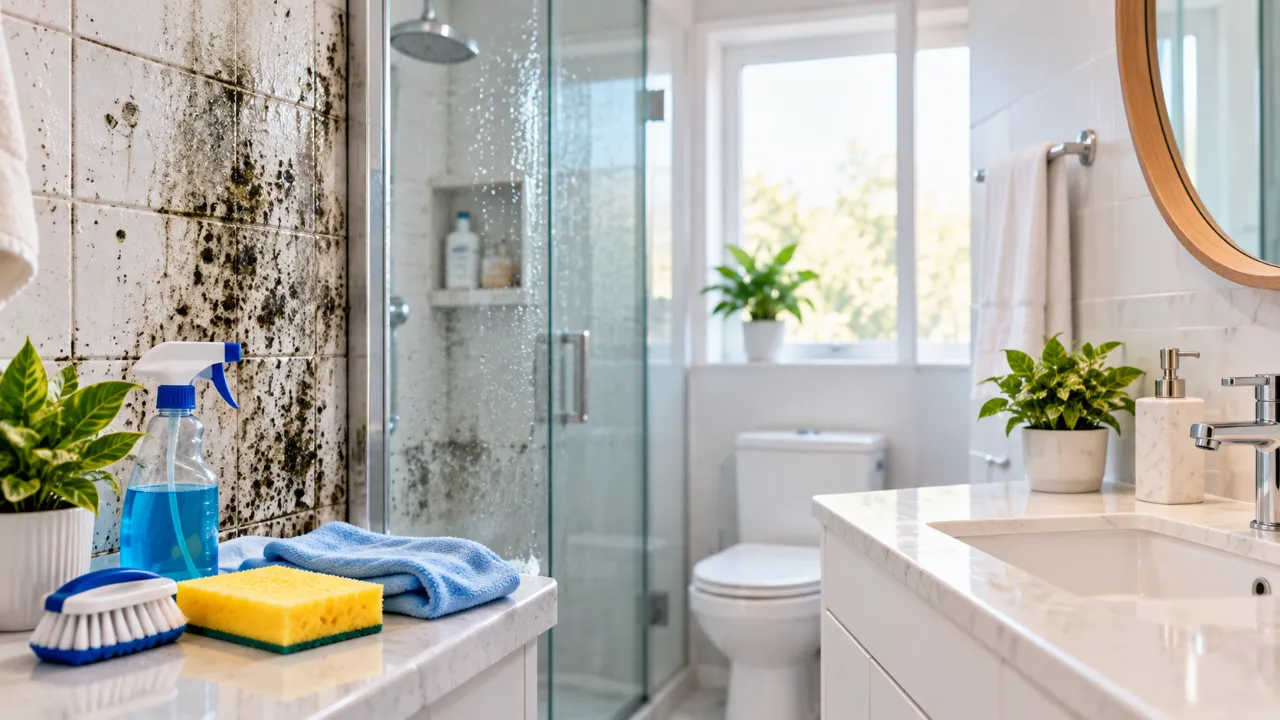
How to Get Rid of Mold in a Bathroom becomes much easier when you stop treating only the visible stain. Before cleaning, mold may look like a small patch on grout or a shower wall. After the right treatment, the surface can be clean, dry and less likely to support new growth. For small areas, use white vinegar on porous surfaces or a properly diluted bleach solution on non-porous surfaces. Most importantly, always ventilate the room, protect yourself and check the size first.
Key Update:
- Use undiluted distilled white vinegar for porous areas such as grout.
- Meanwhile, use a diluted bleach solution only on non-porous surfaces such as ceramic tile, tubs and sinks.
- Do not clean mold covering more than 10 square feet yourself.
- Finally, dry the bathroom thoroughly after cleaning to reduce recurring moisture.
How to Get Rid of Mold in a Bathroom Safely
To get rid of mold in a bathroom, spray the correct cleaner onto the affected surface, allow enough contact time, scrub with a firm-bristled brush, rinse where appropriate and dry completely. White vinegar works well on porous grout, while diluted bleach is intended for non-porous surfaces. However, never mix bleach with ammonia or another cleaner.
The most important distinction is between surface cleaning and moisture control. A dark mark may disappear after scrubbing, yet mold can return if a leaking fixture, wet grout or poor ventilation keeps the area damp. Therefore, the U.S. Environmental Protection Agency’s mold remediation guidance also emphasizes moisture control as a central part of mold management.
What should you do before cleaning?
Before you get rid of mold in a bathroom, protect your skin, eyes and breathing zone. For example, put on rubber gloves, safety goggles and a face mask or N95 respirator. These precautions help reduce contact with mold and limit the chance of breathing in disturbed spores during scrubbing.
Ventilation matters just as much. If one is available, open a window and turn on the bathroom exhaust fan before cleaning. In addition, keep the airflow going while the surface dries. If the room has no effective ventilation, avoid creating a strong concentration of cleaning vapors in the enclosed space.
Check the affected area first
Measure the visible mold rather than estimating its size. If it covers more than 10 square feet, contact a professional mold remediation service instead of handling the work yourself. In that situation, larger growth may involve hidden moisture or areas that require specialized containment and removal.
- Small patch: prepare protective equipment and choose a suitable cleaner.
- Large area: stop and arrange a professional assessment.
- Recurring growth: inspect plumbing, fixtures, grout and ventilation before repeating the same cleaning routine.
Which cleaning method fits the surface?
The right method depends on whether the mold is on a porous or non-porous surface. Porous grout can absorb moisture, so white vinegar is the preferred option from the supplied cleaning methods. By contrast, ceramic tile, tubs and sinks are non-porous, making a diluted bleach solution more suitable for those surfaces.
| Surface or stain | Cleaner | Contact time | Finishing step |
|---|---|---|---|
| Porous grout | Undiluted distilled white vinegar | 30 to 60 minutes | Scrub, rinse and dry |
| Ceramic tile, tub or sink | Bleach mixed with water | 5 to 10 minutes | Scrub, rinse and dry |
| Grout or wall stain | Baking soda paste | 15 to 30 minutes | Scrub and wipe clean |
White vinegar for grout
Spray undiluted distilled white vinegar directly onto the mold. Then let it sit for 30 to 60 minutes before scrubbing. This extended contact time allows vinegar to penetrate porous areas such as grout instead of being wiped away too quickly.
Use a medium or stiff-bristled brush and work across the affected grout lines. After scrubbing, rinse the surface and dry it completely. For a busy household, cleaning one small section at a time can make the 30-to-60-minute waiting period easier to manage.
Bleach for non-porous surfaces
Mix no more than 1 cup of household bleach with 1 gallon of water. Next, apply the solution to non-porous surfaces such as ceramic tile, tubs and sinks. Allow it to remain for 5 to 10 minutes, then scrub firmly, rinse with clean water and dry the surface completely.
Bleach safety is non-negotiable. Never mix bleach with ammonia or other cleaners. Also, use the solution only in a well-ventilated bathroom and keep children and pets away from the area during cleaning.
Baking soda paste for stains
Combine equal parts baking soda and water to make a thick paste. Apply the paste to grout or wall stains and let it sit for 15 to 30 minutes. Afterward, scrub the area thoroughly and wipe it clean.
Baking soda paste is useful when a stain needs focused treatment rather than a sprayed liquid. However, removing a mark does not always mean the moisture problem is solved. Therefore, check for condensation, leaks and damp materials if the discoloration returns.
How can you clean mold efficiently?
Efficiency comes from organizing the work around contact time. Instead of spraying the entire bathroom at once, choose one manageable section, apply the appropriate cleaner and use the waiting period to prepare the brush, rinse water and drying cloths. As a result, this approach reduces wasted time and limits exposure to cleaning vapors.
- First, measure the affected area and confirm that it is under 10 square feet.
- Next, open the window and turn on the exhaust fan.
- Then, put on gloves, goggles and a face mask or N95 respirator.
- After that, apply vinegar, diluted bleach or baking soda paste according to the surface.
- Wait for the full contact time instead of scrubbing immediately.
- Scrub with a medium or stiff-bristled brush.
- Rinse when the method requires rinsing.
- Finally, dry grout, tile, fixtures and nearby surfaces completely.
A practical example is a small patch around a shower drain. If a person has only 20 minutes available, they can apply the cleaner first, prepare the room while it sits and scrub as soon as the required contact time ends. That is more effective than repeatedly wiping the area without allowing the cleaner enough time to work.
Which mistakes make bathroom mold return?
Many failed cleaning attempts come from rushing the process or treating every surface in the same way. Knowing how to get rid of mold in a bathroom is not only about choosing a product. Instead, it also requires avoiding actions that spread moisture, damage materials or leave the root problem untouched.
- Scrubbing too soon: Removing cleaner before its 5-to-60-minute contact period ends can reduce its effectiveness.
- Using bleach on every surface: Bleach is specified here for non-porous surfaces, not as a universal treatment for porous grout.
- Mixing cleaners: Combining bleach with ammonia or other cleaners can create dangerous fumes.
- Ignoring the 10-square-foot limit: Larger areas deserve professional assessment rather than improvised household cleaning.
- Leaving surfaces wet: Damp grout, shower walls and fixtures can support another cycle of growth.
One common efficiency mistake is cleaning the stain while ignoring the bathroom fan. For instance, if dust blocks the fan intake, the room may stay humid for too long after every shower. Consequently, vacuuming dust from the exhaust fan every few months helps it move air more effectively.
How do you prevent new mold growth?
To keep mold from returning, reduce moisture every day rather than waiting for another visible patch. Run the bathroom exhaust fan during the shower and continue running it for at least 20 to 60 minutes afterward. The longer setting is useful when the room remains visibly humid.
After each shower, use a squeegee on the shower walls and doors. This removes a thin film of water that would otherwise remain on tile, glass and grout. Although drying takes less than a few minutes in many bathrooms, it directly reduces the moisture available for new growth.
Inspect plumbing and fixtures regularly. A slow leak beneath a sink, around a shower fitting or near a bathtub can keep a hidden area damp. Therefore, fixing that leak is usually more valuable than repeating surface cleaning every few weeks.
A simple weekly moisture routine
- Run the exhaust fan during bathing and for 20 to 60 minutes afterward.
- Squeegee shower walls and doors after use.
- Check grout lines, corners and fixture connections for dampness.
- Vacuum dust from the exhaust fan every few months.
- Investigate recurring stains instead of covering them with fresh cleaner.
For a household with a tight schedule, the key is attaching these tasks to habits that already happen. For example, keep the squeegee near the shower door and check the fan when changing bathroom supplies. Small actions are easier to maintain than occasional deep cleaning.
What does a shower-cleaning demonstration show?
A short 1:21 shower-cleaning demonstration can help viewers understand the basic sequence: apply a treatment, allow contact time, scrub the affected area and finish by rinsing or wiping it clean. However, the supplied clip was listed at 10 views three months ago, so it should be treated as a simple visual example rather than a substitute for surface-specific safety guidance.
Visual demonstrations are particularly helpful for showing brush pressure and the amount of product used. Even so, they should not override the key limits: protect yourself, ventilate the room, never mix cleaners and seek professional help when growth exceeds 10 square feet.
When should you call a professional?
Call a professional mold remediation service when the affected area is larger than 10 square feet or when growth keeps returning after moisture problems have been addressed. Professional help is also sensible when mold appears to involve hidden spaces, damaged materials or areas that cannot be cleaned without opening walls or fixtures.
Do not keep repeating household treatments on a surface that remains wet. Persistent moisture can come from plumbing, poor ventilation or water entering behind a shower surface. Finding the source is therefore the efficient step because repeated scrubbing treats the symptom without removing the condition that supports growth.
Frequently asked questions
How to Get Rid of Mold in a Bathroom without bleach?
Use undiluted distilled white vinegar on moldy grout and let it sit for 30 to 60 minutes. Then scrub with a medium or stiff brush, rinse and dry the grout completely.
Can vinegar remove mold from bathroom grout?
Vinegar can treat mold on porous grout when it remains on the surface for 30 to 60 minutes before scrubbing. Afterward, dry the grout and investigate recurring moisture.
How much bleach should be used for bathroom mold?
Mix no more than 1 cup of household bleach with 1 gallon of water. Use the solution on non-porous surfaces, leave it for 5 to 10 minutes, then rinse and dry.
Can bleach and vinegar be used together?
No. Keep bleach away from vinegar, ammonia and other cleaners. Instead, use one cleaning method at a time in a ventilated bathroom and rinse the surface before changing products.
What if bathroom mold covers more than 10 square feet?
Stop household cleaning and contact a professional mold remediation service. In that case, a larger area may involve hidden moisture or materials that need specialized handling.
How long should the bathroom fan run after a shower?
Run the exhaust fan during the shower and for at least 20 to 60 minutes afterward. Choose the longer period when the room stays humid or surfaces remain wet.
How often should a bathroom exhaust fan be cleaned?
Vacuum dust from the fan every few months so it can move air effectively. Otherwise, a clogged fan may leave the bathroom damp even when it is switched on.
Keep the bathroom dry after cleaning
Learning how to get rid of mold in a bathroom is only half the job. First, apply the suitable cleaner, respect the contact time, scrub safely and dry every treated surface. Then use ventilation, squeegeeing, fan cleaning and leak checks to limit new moisture.
Before cleaning, measure the area and gather protective equipment. If the growth exceeds 10 square feet or keeps returning, arrange a professional assessment rather than extending a household treatment beyond its safe limits.