Your Trusted Source for Home Fixes & Guides

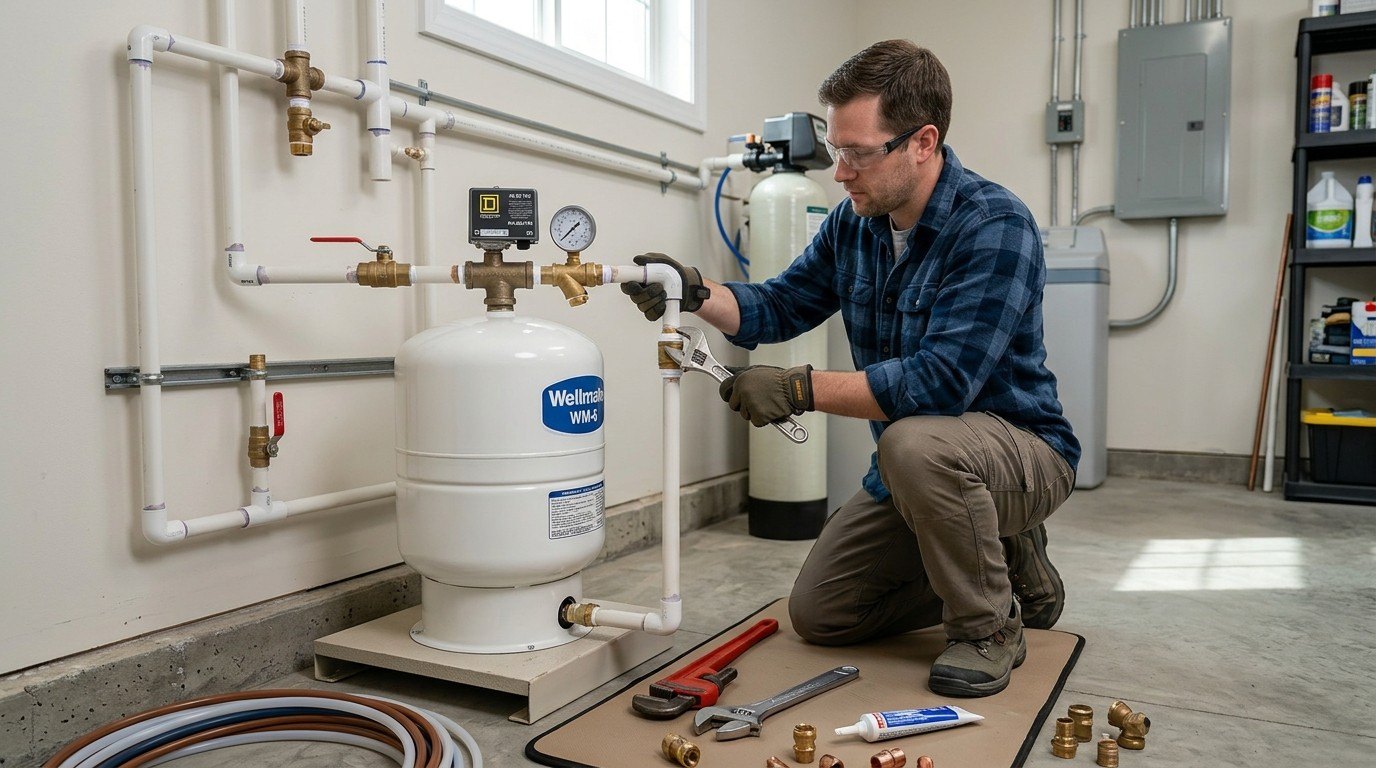
How to Install a Well Water Pressure Tank: Step-by-Step Guide

If you own a home with a private well, you know that steady, reliable water pressure is key. When you turn on the faucet, you want a strong, consistent flow—not sputtering, drops, or wild pressure swings. The heart of this system is the well water pressure tank. Learning How to Install a Well Water Pressure Tank can help you understand the proper setup, pressure settings, plumbing connections, and safety considerations. Whether your old tank is failing or you’re installing a new well system, a properly installed pressure tank can improve water delivery and help protect your plumbing.
But many homeowners wonder: “Can I install a well water pressure tank myself?” The answer is yes—if you’re comfortable with basic plumbing tools, follow safety steps, and know when to call a pro. This guide will walk you step-by-step through the process, highlight common mistakes, and help you decide if this is a DIY job or if you need a licensed plumber. I’ll share real experiences, practical tips, and even a case study from a rural homeowner.
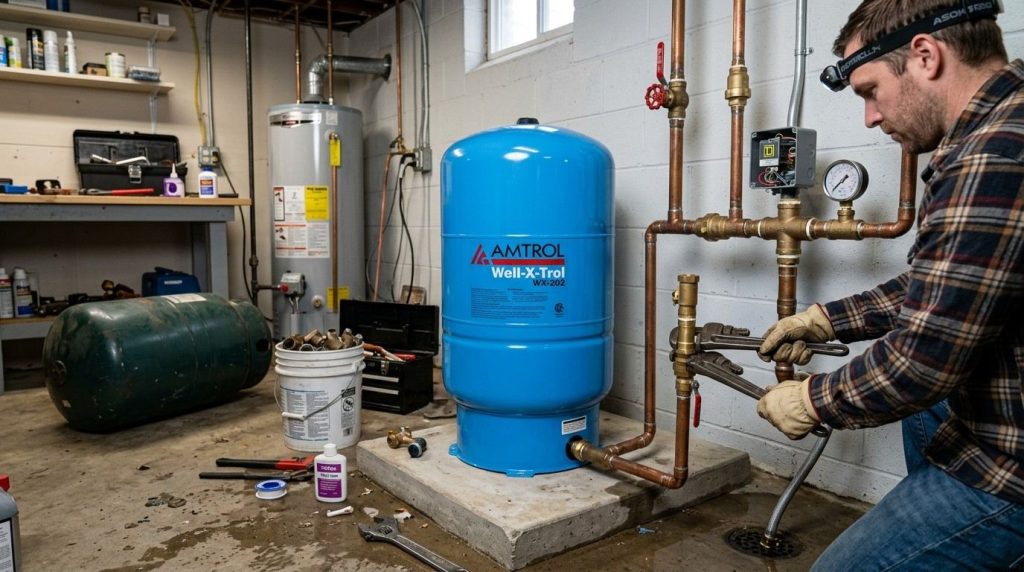
What Is A Well Water Pressure Tank And Why Does It Matter?
A well water pressure tank is a large steel or fiberglass vessel that stores water from your well. Inside, it uses compressed air to keep water pressurized, so when you open a tap, the water flows out smoothly. The pressure tank also tells your well pump when to turn on and off, protecting the pump from constant cycling—a key to longer pump life.
A healthy pressure tank means:
- Stable water pressure at all fixtures
- Reduced pump wear, since it cycles less often
- Fewer repairs and longer life for your whole well system
If your showers sputter, faucets lose pressure, or your pump runs every time you use water, your pressure tank could be the culprit.
Signs You Need To Replace Your Well Water Pressure Tank
Before you start, it’s smart to check if you truly need a new tank. Look for these warning signs:
- Short cycling: Pump turns on/off rapidly, even for small water use
- Low water pressure: Weak flow at taps or appliances
- Air spurts: Air in water lines when you open a faucet
- Visible leaks or rust: Water pooling around the tank or corrosion on fittings
- Waterlogged tank: The tank feels heavy, or tapping it sounds solid (should be hollow at the top)
If you notice any of these, especially together, it’s usually time for a replacement.
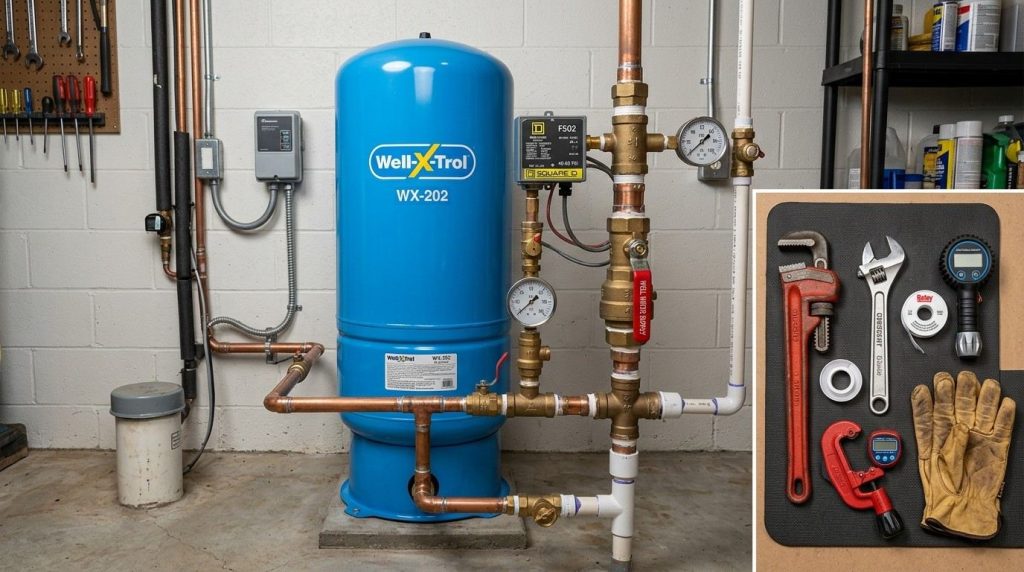
Tools And Materials Needed
Gather your tools and supplies first. Having everything ready makes the job smoother and avoids surprises.
Essential tools:
- Pipe wrench or adjustable wrenches (2)
- Pipe cutter or hacksaw (for copper/galvanized piping)
- Teflon tape (plumber’s tape)
- Pipe thread sealant
- Pliers and screwdrivers
- 5-gallon bucket and towels
Materials:
- New well pressure tank (size appropriate for your home)
- Pressure gauge (0–100 psi range)
- Pressure switch (if replacing)
- Tank T-fitting/assembly (for connecting gauge, switch, drain, etc.)
- Flexible water connectors or pipe (PEX, copper, or PVC as needed)
- Pipe fittings and adapters (check the tank and your system)
- Electrical tape and wire connectors (if needed for the switch)
- Expansion tank (if required by code, especially with water heaters)
Safety gear:
- Safety glasses and gloves
- Non-slip shoes
- Headlamp or work light (well rooms are often dim)
Pro tip: Take clear photos of your current setup before starting. This helps you reconnect things in the right order.
Choosing The Right Well Water Pressure Tank
Not all pressure tanks are created equal. The right size and type matter for performance and pump health.
Sizing Your Tank
Tank size depends on your well pump’s flow rate (GPM—gallons per minute) and your household water usage. Common sizes range from 20 gallons (for small homes) to 80 gallons or more.
Here’s a quick comparison of typical tank sizes:
| Tank Size (Gallons) | Home Size | Pump Flow Rate (GPM) | Recommended For |
|---|---|---|---|
| 20–30 | 1–2 bath | 5–8 | Cabins, small homes |
| 40–50 | 2–3 bath | 8–10 | Average family homes |
| 60–80 | 4+ bath | 10–20 | Large homes, irrigation |
Tip: Bigger tanks mean fewer pump cycles, which extends pump life. But don’t oversize too much—very large tanks take up space and cost more.
Types Of Pressure Tanks
There are two main types:
- Bladder/diaphragm tanks: Most common today. Inside, a rubber bladder separates water from air. Lasts longer, less maintenance.
- Air-over-water tanks: Older style, no bladder. Air and water mix. Needs regular air charging and can become “waterlogged” easily.
Most homeowners should choose a bladder/diaphragm tank for reliability and ease.
Material And Build
- Steel tanks: Strong, last 5–15 years, usually with a glass lining to prevent rust
- Fiberglass tanks: Resist corrosion, lighter, often used in corrosive water areas
Always check warranty and NSF certification for drinking water safety.
Safety Precautions And When To Call A Pro
Working on a well system involves electricity and pressurized water. Mistakes can cause flooding, electrical shock, or damage to your home.
Safety steps:
- Turn off power at the breaker panel (labelled “well pump” or “water system”)
- Relieve all water pressure before disconnecting pipes
- Wear gloves and eye protection
- Never work alone in a crawlspace or basement
Call a professional if:
- You see complicated electrical wiring or high-voltage controls
- Your well is older or has unusual plumbing
- You’re unsure about local plumbing codes
- The tank is in a tight spot you can’t safely reach
Many states require a licensed plumber for well system work. Always check your local codes before starting.
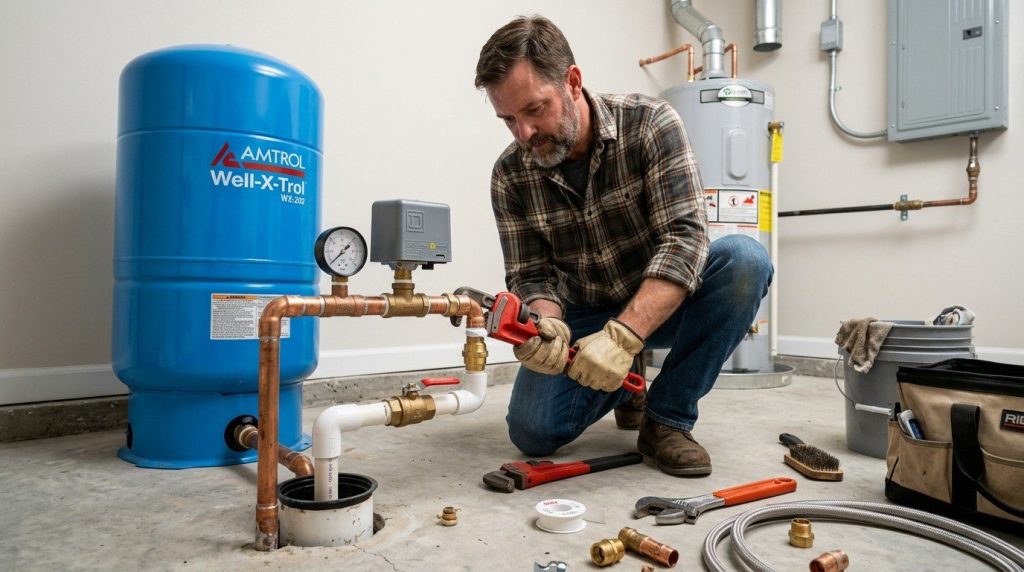
Step-by-step: How To Install A Well Water Pressure Tank
Ready to get hands-on? Here’s how to replace or install a pressure tank from start to finish.
1. Shut Off Power And Water
- Find your well pump breaker and switch it off. Test to be sure power is off.
- Close the main water shutoff valve between the well and the house.
- Open a faucet at the lowest point in your home (like a basement sink) to relieve system pressure.
2. Drain The Old Pressure Tank
- Place a bucket under the tank’s drain valve.
- Attach a garden hose if needed, and open the valve to drain all water.
- Some tanks have no drain—use a pipe wrench to loosen a lower fitting and catch water in the bucket.
- When fully drained, remove any wires from the pressure switch (label them or take photos).
3. Disconnect Plumbing And Remove Tank
- Loosen all pipe connections to the tank using wrenches.
- Support heavy pipes so they don’t bend or crack.
- Remove the old tank carefully—it may be heavy, especially if waterlogged.
4. Prepare The New Pressure Tank
- Unbox the tank and check for shipping damage.
- Set it in place on a solid, level floor (concrete pads are ideal).
- Install a new tank T-assembly onto the tank’s bottom port. Wrap all threaded connections with Teflon tape and use pipe sealant.
A typical T-assembly connects:
- Pressure gauge
- Pressure switch
- Drain/faucet
- Relief valve (if required)
5. Connect Plumbing
- Reconnect your water pipes to the new tank using flexible hoses or rigid pipe, depending on your system.
- Use the proper adapters to avoid leaks—don’t force mismatched threads.
- Tighten fittings snugly, but don’t overtighten and crack plastic parts.
Pro tip: If your system uses PEX tubing, use proper crimp rings and a PEX tool for secure connections.
6. Wire The Pressure Switch
- If installing a new pressure switch, connect the wires as per your photos/labels.
- Most switches have clear terminals for “Line” (from breaker) and “Load” (to pump).
- Replace the cover and ensure no bare wires are exposed.
- If you’re unsure, call an electrician—improper wiring can be dangerous.
7. Check Air Pressure In The Tank
- Before turning on water, check the pre-charge air pressure using a tire gauge at the air valve (usually on top).
- The air pressure should be 2 psi below your pressure switch’s cut-in setting. (For a 40/60 switch, set air to 38 psi.)
- Adjust with a small air compressor or release air as needed.
8. Fill The System And Test For Leaks
- Close all open faucets and the tank’s drain valve.
- Open the main water valve from the well.
- Restore power at the breaker.
- Let the tank fill until the pressure switch clicks off (listen for the “click”).
- Check all connections for leaks—tighten as necessary.
9. Bleed Air And Test Water Pressure
- Open faucets around the house to purge air from the lines.
- Test water flow at each fixture.
- Watch the pressure gauge: The pump should turn on at the “cut-in” pressure (often 40 psi) and off at the “cut-out” pressure (60 psi).
- Adjust the pressure switch if needed (see below).
10. Clean Up And Inspect
- Wipe up any water spills.
- Replace insulation or covers you removed.
- Keep the area around the tank clear for future service.
Common mistakes:
- Forgetting to set the pre-charge air pressure (leads to pump cycling problems)
- Cross-threading fittings or overtightening plastic parts
- Skipping leak checks—small drips can cause big damage over time
Adjusting The Pressure Switch
Most well systems use a pressure switch that turns the pump on and off between two pressure points—commonly 40 psi (on) and 60 psi (off). If your pressure feels too low or high, you can adjust these settings.
How to adjust:
- Turn off power.
- Remove the cover from the pressure switch.
- Use a nut driver to adjust the large spring (both cut-in and cut-out) or the small spring (just cut-out).
- Small changes make a big difference—adjust in 2–3 psi increments.
- Replace the cover and restore power.
Never exceed the pressure rating on your tank or plumbing. If in doubt, consult a plumber.
Case Study: Replacing A Waterlogged Pressure Tank
Let’s look at a real example. Mark, a homeowner in rural Ohio, noticed his water pump was turning on every 30 seconds—even when no one was using water. His showers were weak, and the tank felt heavy and solid when tapped.
Mark checked his system and found:
- The tank was over 15 years old.
- The air valve leaked water—a sign of a burst bladder.
- Water was pooling around the base.
Mark chose a 44-gallon diaphragm tank, matching his home’s needs. He shut off power and water, drained the old tank, and followed the steps above. The only hiccup? He forgot to set the pre-charge air pressure, causing the pump to cycle quickly after installation.
A quick adjustment fixed the issue.
Now, Mark enjoys steady water pressure, and his pump cycles about 1–2 times per hour instead of every minute—saving energy and reducing wear.
Key takeaways from Mark’s experience:
- Always check and set pre-charge pressure before filling.
- Take photos before disconnecting wires and pipes.
- Use Teflon tape on all threaded fittings to prevent leaks.
Maintenance Tips For Long-lasting Performance
A well-installed tank can last 7–15 years (sometimes more). These habits help extend its life:
- Check air pressure (with power off) every 6–12 months.
- Inspect the pressure gauge and switch for rust or corrosion.
- Listen for rapid pump cycling—fix problems early to prevent pump burnout.
- Keep the tank area dry—standing water causes rust.
- If you see leaks, address them right away.
Pro insight: An annual system check is wise, especially before winter or after any plumbing work.
Comparing Pressure Tank Brands And Features
Choosing a tank isn’t just about size. Here’s a side-by-side look at common brands and features:
| Brand | Type | Warranty (Years) | Special Features |
|---|---|---|---|
| Well-X-Trol | Bladder | 7–10 | Steel, corrosion-resistant, high-end |
| Amtrol | Diaphragm | 5–7 | Replaceable bladder, NSF certified |
| Water Worker | Bladder | 5 | Budget-friendly, easy to find |
| Pentair | Fiberglass | 5–10 | Corrosion-proof shell, lightweight |
Advice: Look for brands with good support and readily available parts. Avoid off-brand tanks with limited warranties.
Troubleshooting Common Issues After Installation
What if you finish and something isn’t quite right? Here’s how to tackle common post-install problems:
- Pump won’t turn on: Check power, pressure switch wiring, and breaker.
- Tank won’t fill: Confirm main water valve is open; check for blocked pipes.
- Rapid cycling: Re-check air pre-charge (should be 2 psi below cut-in pressure).
- Water leaks: Tighten connections, or re-wrap with Teflon tape.
- Low pressure at fixtures: Adjust pressure switch, or check for clogged filters/screens.
If you can’t solve the problem, or if you see electrical sparks, smell burning, or hear odd noises from the pump, turn off power and call a licensed well contractor.
Understanding Local Codes And Permits
In many areas, plumbing codes regulate well system work. Some states or counties require a permit and inspection for any pressure tank replacement. Others may insist that only licensed professionals work on well systems.
Before you start:
- Call your local building department or health department.
- Ask if a permit or inspection is needed.
- Save all receipts and tank documentation for future home sales or insurance.
Tip: Keeping records also helps with warranty claims if your tank fails early.
When You Should Not Diy
Installing a pressure tank is within reach for many handy homeowners. But there are times when you should call a pro:
- Complex electrical controls: Some well systems include advanced relays, variable speed drives, or high-voltage wiring.
- Old, corroded pipes: If pipes break easily or fittings are rusted solid, removal can get ugly fast.
- Unfamiliar plumbing layouts: Unusual or hidden piping can lead to mistakes.
- Health concerns: If your water is used for medical devices or has contamination issues, always use a pro.
A bad install can damage your pump, flood your home, or even void insurance. When in doubt, it’s worth the investment to hire a licensed plumber or well contractor.
Real-world Insight: The Forgotten Check Valve
Here’s something many guides miss: the check valve. This simple part keeps well water from draining back into the well when the pump stops. If you replace the tank and still have pressure loss, a leaky check valve could be the reason. Sometimes, it’s built into the pump; other systems put it near the tank. If you’re losing pressure overnight, ask a plumber to check this too.
Environmental And Energy Benefits
Upgrading to a modern pressure tank isn’t just about convenience. Newer tanks:
- Reduce well pump run time, saving electricity
- Lower the chance of pump burnout and water waste
- May qualify for efficiency rebates in some areas
According to the EPA’s Private Well Program, properly maintained well systems protect groundwater resources and your family’s health.
Frequently Asked Questions
How Long Does A Well Water Pressure Tank Last?
Most modern bladder or diaphragm tanks last 7–15 years. Lifespan depends on water quality, installation, and maintenance. Regular checks help catch problems early.
What Size Pressure Tank Do I Need For My Home?
A typical 2–3 bath home with a 1 HP well pump uses a 40–50 gallon tank. If you have more bathrooms or irrigation, size up to 60–80 gallons. Always match the tank to your pump’s flow rate.
Can I Use My Old Pressure Switch With A New Tank?
Often yes, if it’s in good shape and matches your desired pressure settings. If it’s corroded, unreliable, or over 10 years old, replace it when you install the new tank.
Why Does My Pump Keep Cycling On And Off Quickly?
Rapid cycling usually means low air pressure in the tank or a ruptured bladder. Check and set the air pre-charge, and inspect for waterlogged conditions.
Is It Safe To Install A Pressure Tank Myself?
Yes, if you follow safety steps and have basic plumbing/electrical skills. Always turn off power, relieve pressure, and wear protection. If wiring or codes are confusing, or you have any doubts, call a licensed pro.
Installing a well water pressure tank is a project many homeowners can tackle with care and preparation. The rewards are steady water flow, lower energy bills, and peace of mind. If you’re unsure, don’t hesitate to seek expert help—protecting your home’s water system is worth it.