Your Trusted Source for Home Fixes & Guides


How to Install a Shower Drain: Easy Guide for Beginners

Installing a shower drain is one of those home improvement projects that looks intimidating at first. Many homeowners worry about leaks, water damage, or plumbing mistakes. How to Install a Shower Drain is easier when you follow the right steps, use the correct tools, and understand the basics of bathroom plumbing. This guide walks you through the key installation steps, from preparing the drain opening to creating a secure, leak-resistant connection.
This guide will walk you through every part of the process, from choosing the best drain to finishing the job safely and neatly. You’ll learn practical advice, common mistakes to avoid, and when to call a pro. Let’s make sure your next shower drain installation is smooth, secure, and long-lasting.
Understanding Shower Drain Basics
Before you start, it’s important to know how a shower drain works and what types are available. A shower drain is more than just a hole in the floor; it’s a connection point between your shower pan and the home’s drain pipes. It needs to handle water quickly, prevent leaks, and block unwanted odors.
A well-installed drain also helps prevent water from backing up and causing mold or mildew problems under your shower. The drain works together with your bathroom’s ventilation and waterproofing systems to keep your home safe and clean.
Types Of Shower Drains
There are several types of shower drains you’ll see in American bathrooms:
- Standard round drain – Most common, fits traditional shower pans.
- Linear drain – Long and rectangular, often used for walk-in showers.
- Tile-in drain – Allows tile to cover the drain for a seamless look.
- Point drain – Usually centered, works well for small showers.
Each type has its own installation method. Most DIYers start with a standard round drain, which fits most homes.
Linear and tile-in drains are popular in modern renovations. A linear drain, for example, is excellent for accessible showers or for creating a curbless entry. Tile-in drains are favored when you want a “hidden” drain effect where the floor looks continuous.
Components Of A Shower Drain
A typical shower drain has:
- Strainer (top part, visible)
- Drain body (middle, connects to pipes)
- Gasket or washer (seals the connection)
- Locknut (tightens the drain)
- Tailpiece (connects to plumbing)
Each component has a role. The strainer keeps out hair and debris, preventing clogs. The gasket or washer stops water from leaking around the drain. The locknut holds everything tight, while the tailpiece ensures water flows smoothly into the home’s drainage system.
Understanding these parts helps you avoid mistakes. For example, forgetting the gasket is a common error that leads to leaks.
Common Materials
Shower drains are made from:
- PVC – Affordable, easy to work with.
- ABS plastic – Strong, chemical-resistant.
- Brass – Durable, good for older homes.
- Stainless steel – Modern look, resists corrosion.
Choose a drain material that matches your plumbing. PVC is popular for DIY projects because it’s light and simple.
If you have metal pipes, consider using a brass or stainless steel drain for better compatibility. Some older homes may have cast iron connections—these may need an adapter to fit modern drains.
Planning Your Shower Drain Installation
Proper planning saves time and prevents headaches. Here’s what you need to think about before starting.
Tools And Materials
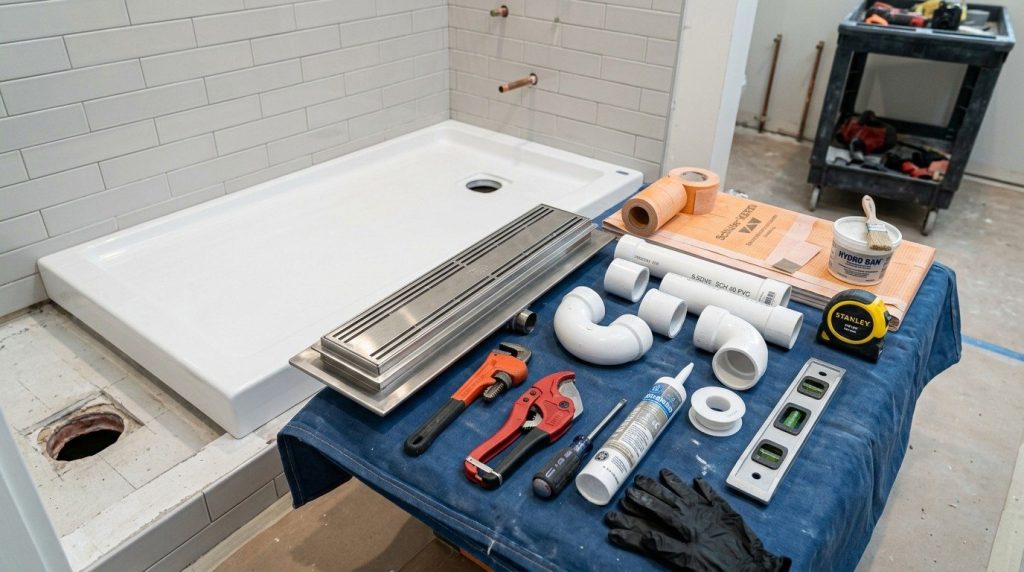
You’ll need:
- New shower drain (choose the right type)
- Screwdriver
- Adjustable wrench
- Pipe wrench
- Utility knife
- Plumber’s putty or silicone caulk
- Tape measure
- Bucket
- PVC primer and cement (if using PVC pipes)
- Gloves
- Safety goggles
If you’re replacing an old shower, you may need extra materials like replacement tiles, waterproofing membrane, or a new shower pan. Always check the instructions provided by your drain manufacturer for any special tools.
Check Local Codes
Always check local plumbing codes. Most areas require shower drains to be at least 2 inches in diameter and have a P-trap to block sewer gases. If your home’s plumbing doesn’t meet code, call a plumber.
Codes may also require certain types of backflow prevention or access panels. Some cities need inspections for new installations—especially in condos or multi-family buildings.
Measure Twice
Measure the size and location of your existing drain. If you’re replacing an old drain, make sure the new one fits. For a new shower pan, mark the drain location carefully.
It’s easy to misalign the drain if you rush. A misplaced drain can cause water to pool in the shower or make installation impossible.
Case Study: Planning Pays Off
A homeowner in Chicago planned a bathroom remodel. He measured his old drain and found it was 1. 5 inches, but code required 2 inches. By checking ahead, he avoided a costly mistake and upgraded his drain before installing the new shower.
Planning also helped him avoid buying the wrong size drain and pan, saving time and money. He shared his experience with friends, emphasizing that a little preparation can make the entire renovation smoother.
Removing The Old Shower Drain
If you’re replacing a drain, start by removing the old one. This step is tricky but manageable with patience.
Step-by-step Removal
- Turn off water supply – Not always necessary, but safer if you’re working near pipes.
- Remove shower pan or access panel – Use a screwdriver and utility knife.
- Unscrew the strainer – The visible part on top.
- Loosen the locknut under the pan with a wrench.
- Lift out the drain body – Wiggle gently to avoid damaging pipes.
- Clean the area – Remove old caulk, putty, debris.
Some older drains may be rusted or glued in place. In these cases, use penetrating oil to loosen stuck parts, or carefully cut around the drain if necessary. Always protect the area around the drain to avoid damaging waterproofing layers.
Safety Precautions
Wear gloves and safety goggles. If you see mold or water damage, stop and call a professional. Mold can be dangerous, and hidden water damage needs expert repair.
Sometimes, old drains are surrounded by sharp or jagged metal. Work slowly to avoid cuts. If you smell strong sewer gas, ventilate the area and consider wearing a mask.
Common Mistakes
- Using too much force and cracking the shower pan.
- Forgetting to clean the area before installing the new drain.
- Not checking for hidden leaks.
One detail beginners miss: check the condition of the subfloor. If it feels soft or looks stained, you might have a slow leak that needs repair before installing the new drain.
Installing The New Shower Drain
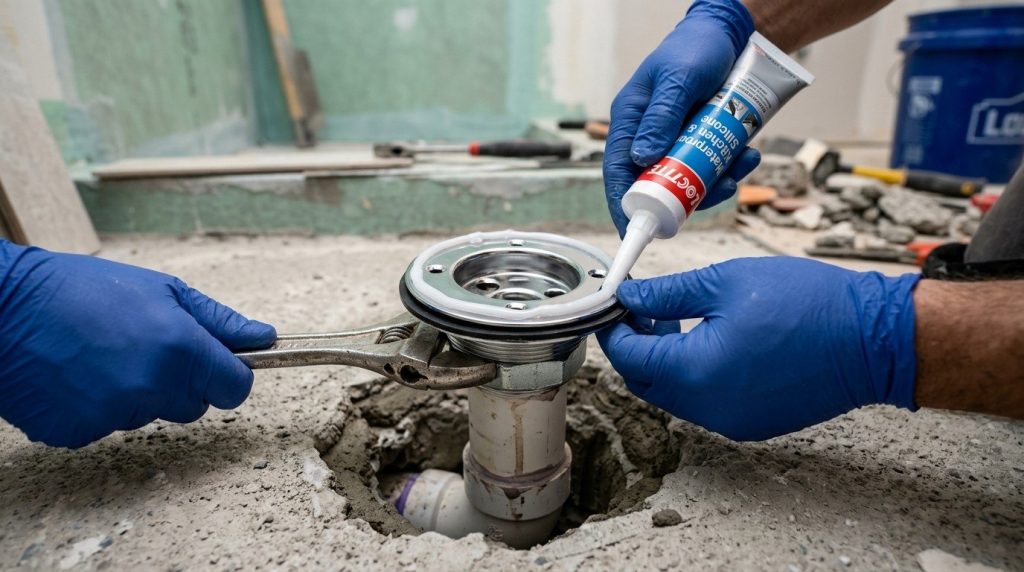
This is the heart of the project. Installing a shower drain correctly prevents leaks and keeps your bathroom safe.
Step-by-step Installation
- Dry fit the drain
- Place the new drain in the hole to check sizing.
- Adjust as needed.
- Apply plumber’s putty or silicone
- Roll a bead of putty or apply silicone under the drain flange.
- This seals the drain against the shower pan.
- Insert the drain body
- Push the drain body into the hole.
- Make sure it sits flat.
- Attach the gasket and locknut
- From underneath, slide the gasket up to the pan.
- Tighten the locknut by hand, then use a wrench.
- Don’t overtighten; you risk cracking the pan.
- Connect the tailpiece to plumbing
- If using PVC, apply primer and cement.
- For metal pipes, use thread sealant.
- Install the strainer
- Screw the strainer onto the top.
If your drain kit includes a compression fitting, follow the instructions closely. Compression fittings need to be tightened just enough to compress the washer, but not so much that the washer bulges out.

Quick Tip: Don’t Skip The Gasket
Skipping the gasket is the number one mistake homeowners make. This small ring is vital for stopping leaks. Always use it and check for proper fit.
If the gasket feels loose or doesn’t sit evenly, reposition it until you’re confident it’s sealing the space between the shower pan and the drain body.
Data Table: Drain Materials Comparison
Here’s a comparison of common shower drain materials:
| Material | Cost (avg.) | Durability | Ease of Installation | Corrosion Resistance |
|---|---|---|---|---|
| PVC | $8-$15 | Good | Easy | High |
| ABS | $10-$18 | Excellent | Easy | High |
| Brass | $25-$50 | Very High | Moderate | Medium |
| Stainless Steel | $30-$70 | Very High | Moderate | Very High |
PVC is most popular for DIY, but brass and stainless steel last longer.
Installing Linear And Tile-in Drains
If you’re using a linear drain or tile-in drain, follow manufacturer instructions closely. These drains often need extra waterproofing and precise leveling.
For tile-in drains, you may need to cut tiles carefully. Use a tile saw and measure twice. Poor tile cuts can cause leaks or uneven surfaces.
Linear drains often require the shower floor to slope in one direction, rather than toward a center point. This is a detail beginners overlook, leading to standing water in the corners. Always check with a level before installing the shower base.
Testing For Leaks And Proper Drainage
After installing the new drain, it’s vital to test for leaks and make sure water flows correctly.
Leak Test Steps
- Plug the drain with a test plug.
- Fill the shower pan with water (about 1 inch deep).
- Wait 15–30 minutes and check underneath for leaks.
- Remove plug and watch water drain.
If you spot leaks, tighten the locknut or add more sealant.
Testing for leaks is not just about looking for drips. Press a dry paper towel against the area under the drain—if it gets wet, there’s a small leak. Small leaks can cause big problems over time, so never skip this test.
Drainage Test
Run water in the shower for several minutes. Watch for slow draining or pooling. If water drains slowly, check for clogs or improper slope.
If water doesn’t flow toward the drain, your shower pan may not be angled correctly. Fixing the slope now prevents headaches later.
Data Table: Leak Causes And Fixes
Here’s a quick guide to common leak causes and solutions:
| Cause | Symptoms | Fix |
|---|---|---|
| Loose locknut | Water leaks under pan | Tighten locknut |
| Missing gasket | Persistent leaks | Install gasket |
| Poor sealant | Water seepage | Reapply putty or silicone |
| Cracked pan | Major leaks | Replace pan |
Most leaks come from loose parts or missing gaskets.
Finishing Touches And Clean-up
Once your drain is installed and tested, it’s time to finish the job and clean up.
Sealing Around The Drain
Use silicone caulk to seal around the drain. This keeps water from seeping under tiles or the shower pan.
- Apply a thin bead of caulk.
- Smooth with a wet finger or caulk tool.
- Let dry for 24 hours before using the shower.
If your shower uses natural stone tiles, choose a neutral-cure silicone to avoid staining. Pay attention to the caulk’s expiration date—old caulk won’t cure properly.
Cleaning Up
Remove all old materials, debris, and unused sealant. Wash your hands and tools. If you spilled primer or cement, clean it quickly before it sets.
Proper clean-up helps you spot any small problems that might have been missed, such as drips of water or small cracks. It also keeps your work area safe.
Case Study: Clean-up Saves Money
A homeowner in San Francisco cleaned up carefully after installing a drain. He found a small crack in the shower pan he missed earlier. By spotting it before finishing, he avoided water damage and repaired the crack before it became a problem.
Careful clean-up also prevented clogged drains from stray debris, a detail many beginners miss.
Common Mistakes And How To Avoid Them
Many DIYers make the same errors when installing shower drains. Here’s how to avoid the most common ones.
- Skipping the gasket – Always use the gasket provided.
- Overtightening locknut – Tighten just enough; too much can crack the pan.
- Using wrong sealant – Plumber’s putty works for metal drains; silicone is better for plastic.
- Not checking for leaks – Always test before finishing.
- Ignoring local codes – Codes are there for safety; check before starting.
- Poor slope – Shower pans must slope toward the drain. If not, water pools.
Practical Advice
If you’re unsure about the slope or plumbing layout, consult a professional. Improper slope can lead to constant water issues.
Another overlooked mistake is using the wrong size drain for your shower pan. Always check manufacturer recommendations. If you’re installing a luxury or custom shower, ask about recommended drain flow rates—some high-output showers need larger drains.
Safety Precautions Every Homeowner Should Know
Plumbing projects can be safe if you follow basic rules. Here are tips to keep your shower drain installation safe.
- Wear gloves to protect your hands from sharp edges and chemicals.
- Use safety goggles when cutting or working under the shower pan.
- Avoid working alone if possible—have someone nearby in case of emergency.
- Don’t force parts; if something doesn’t fit, check measurements.
- If you smell sewer gas or see mold, stop and call a licensed plumber.
Never mix chemical cleaners or drain openers—dangerous fumes can result. If your project requires soldering or heat, have a fire extinguisher nearby.
When To Call A Professional
You should call a licensed plumber if:
- The drain won’t fit your existing pipes.
- You find mold or significant water damage.
- You’re unsure about local codes.
- You can’t stop a leak after several tries.
A professional can help you avoid big repairs down the road.
Choosing The Right Shower Drain For Your Bathroom
Picking the right drain is important for both function and style. Here’s how to make a smart choice.
Factors To Consider
- Drain size – Standard is 2 inches, but check your plumbing.
- Drain type – Round, linear, tile-in, or point.
- Material – PVC for easy installs, brass or stainless for durability.
- Style – Choose a strainer design that fits your bathroom.
- Budget – Drains range from $8 to $70 or more.
Don’t forget the finish: chrome, brushed nickel, oil-rubbed bronze, and matte black are all popular. Match your drain finish to other bathroom hardware for a coordinated look.
Data Table: Drain Type Comparison
This table compares drain types for different needs:
| Type | Best For | Installation Difficulty | Style Options |
|---|---|---|---|
| Standard round | Most homes | Easy | Many |
| Linear | Walk-in showers | Moderate | Modern |
| Tile-in | Luxury bathrooms | Advanced | Seamless |
| Point | Small showers | Easy | Basic |
If you’re remodeling, think about upgrading to a linear drain for a sleek look.
Maintaining Your Shower Drain
Installing a drain is only the first step. Keeping it clean and clear ensures your shower stays fresh and trouble-free.
Cleaning Tips
- Remove the strainer and clean it monthly.
- Pour boiling water down the drain to clear soap and hair.
- Use a plastic drain snake for clogs; avoid harsh chemicals.
- Check the caulk and seals once a year.
If you have hard water, mineral buildup can occur. Use a mild vinegar solution to dissolve it. Never use metal snakes on plastic drains—they can scratch or break the pipe.
Preventing Odors
Bad smells often come from blocked drains or dried-out traps. Run water regularly and keep the area clean. If odors persist, check for leaks.
If your shower is rarely used, pour a cup of water down the drain every few weeks to keep the trap full. A dry trap lets sewer gas escape—a common cause of bad smells.
Practical Maintenance Advice
Don’t ignore small problems. If you see slow drainage or minor leaks, fix them right away. Small issues can become big, expensive repairs.
Even if your drain is working fine, schedule an annual inspection for your entire bathroom plumbing. This helps you spot worn-out parts, loose connections, or early signs of trouble before they cause damage.
Real-life Case Study: Diy Success And Lessons Learned
Let’s look at a real example of a homeowner who installed a shower drain.
A couple in Houston wanted to upgrade their bathroom with a modern linear drain. They researched local plumbing codes, bought the right materials, and followed every step carefully. During installation, they noticed the shower pan wasn’t sloped enough. Instead of pushing ahead, they paused and adjusted the slope, then continued.
Their careful planning paid off—no leaks, no pooling water, and a stylish new shower. The couple learned that patience and attention to detail are the keys to success. They also realized the value of checking local codes and testing for leaks before finishing.
They also mentioned that watching online tutorials helped them visualize tricky parts of the installation, like aligning the drain and connecting the plumbing. Their advice: “Don’t rush—double-check every step, and don’t be afraid to ask for help if you get stuck.”
Frequently Asked Questions
How Long Does It Take To Install A Shower Drain?
Most DIY shower drain installations take 2–4 hours, depending on your experience and the type of drain. Linear or tile-in drains can take longer. If you need to remove an old drain, add extra time.
Beginners should plan for a half-day, allowing breaks for checking instructions and testing for leaks.
Can I Install A Shower Drain Without Removing The Shower Pan?
Usually, you need to access the bottom of the pan to install the drain correctly. Some replacement drains are designed for top-down installation, but they don’t seal as well. For a secure, leak-free install, it’s best to remove or lift the pan.
If your shower is built on a slab (concrete floor), access can be challenging. Sometimes you need to open the ceiling below or cut a small section of flooring—ask a pro if unsure.
What’s The Best Way To Prevent Shower Drain Leaks?
The best way is to use the gasket and proper sealant, tighten the locknut carefully, and test for leaks before finishing. Never skip the leak test, and always follow manufacturer instructions.
Also, ensure the shower pan is not cracked, and the drain is centered and level before sealing.
Is Plumber’s Putty Or Silicone Better For Sealing Shower Drains?
Silicone works better for plastic drains and wet areas. Plumber’s putty is good for metal drains, but it can break down in moist environments. Use silicone for most modern showers.
If you’re working with natural stone or porous materials, avoid oil-based putty, as it can stain.
Where Can I Find More Information About Plumbing Codes?
You can find details on plumbing codes and shower drain requirements from the International Code Council. Always check your local codes before starting a project.
Installing a shower drain is a manageable DIY project with the right tools and preparation. Careful planning, attention to detail, and patience will help you avoid common mistakes and ensure your bathroom stays leak-free for years. If you run into trouble, don’t hesitate to call a pro—protecting your home is always worth it.