Your Trusted Source for Home Fixes & Guides

Water Pressure Regulator How to Adjust Step by Step Guide

Water Pressure Regulator How to Adjust is a common question for homeowners looking to improve water flow and protect their plumbing system. If your shower feels weak, your washing machine takes too long to fill, or you notice banging pipes and leaks, your water pressure may need adjustment.
Learning Water Pressure Regulator How to Adjust can help you achieve the right balance for better performance, increased comfort, and long-term plumbing protection. This guide walks you through the process step by step, highlights common mistakes to avoid, and explains when it’s time to call a professional.
Understanding Water Pressure Regulators
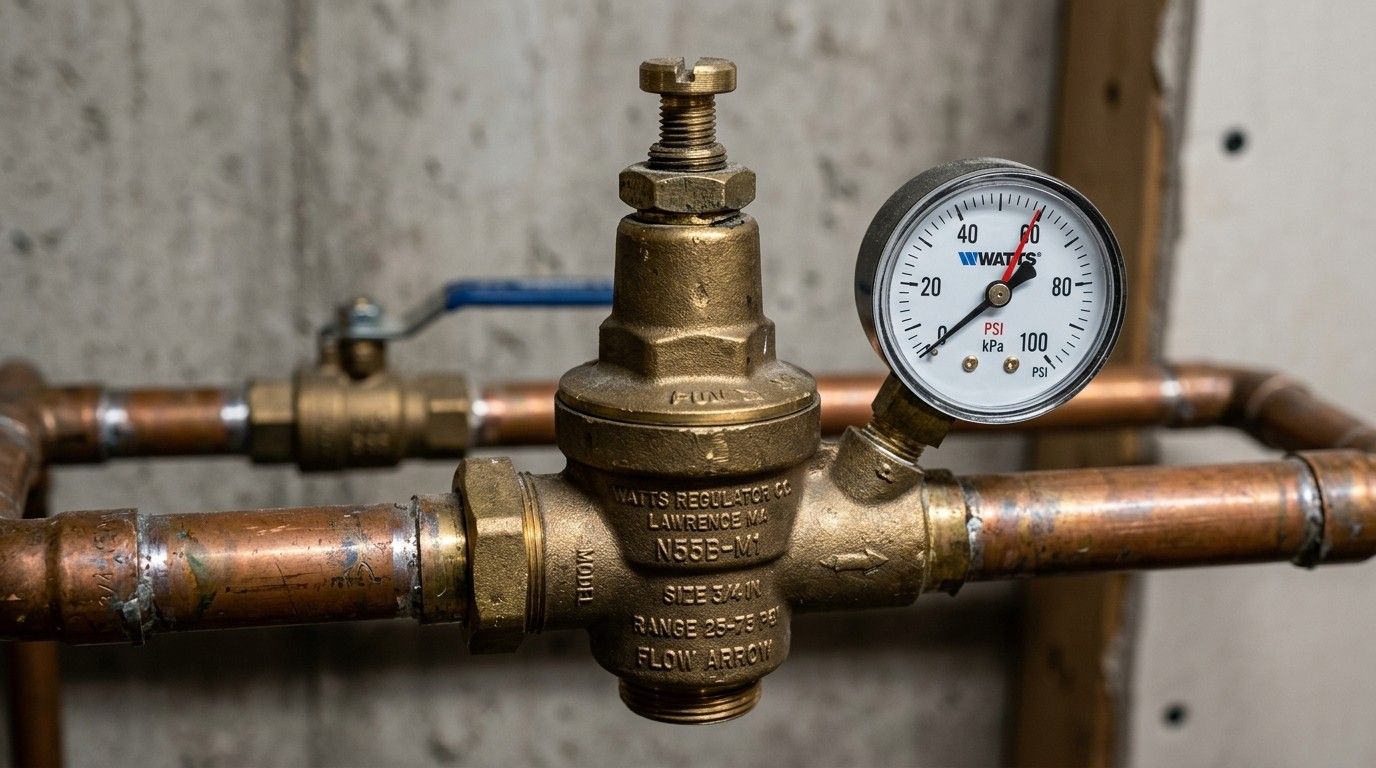
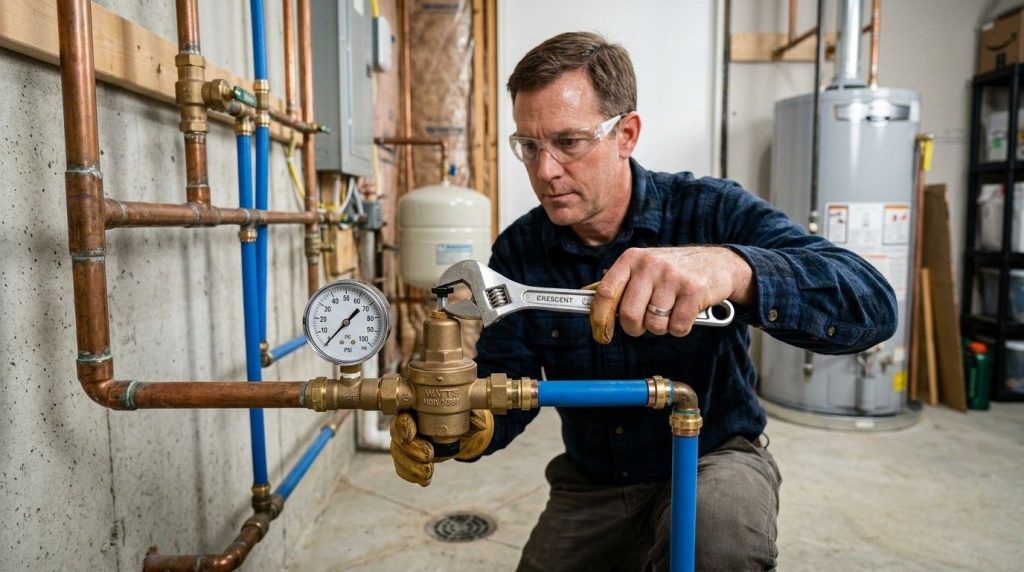
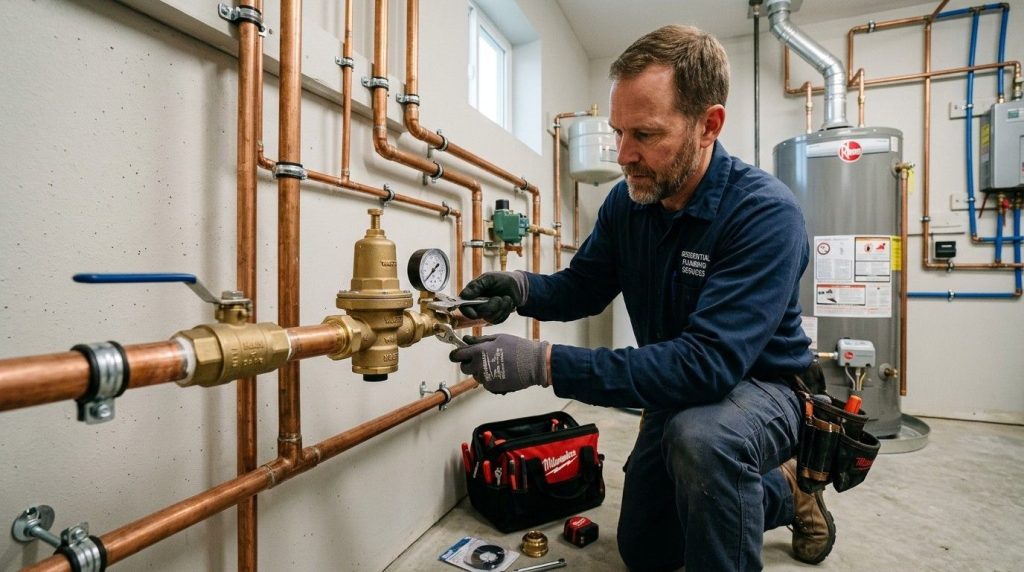
Most homes in the U.S. have a water pressure regulator near where the main water line enters the house. This device keeps the water pressure steady, so it’s not too high or too low. Regulators are usually shaped like a bell or dome, with a screw or bolt at the top.
Regulators don’t just protect your pipes—they also shield sensitive appliances like dishwashers, washing machines, and water heaters from harmful surges. Many homeowners don’t realize that local water suppliers sometimes increase pressure during certain hours, which can put extra stress on your plumbing system if you don’t have a functioning regulator.
Why Water Pressure Matters
Water pressure is measured in pounds per square inch (PSI). The ideal range for homes is 40–60 PSI. If pressure is too high, pipes and appliances wear out faster. Too low, and you’ll get poor flow at faucets and showers. According to the American Water Works Association, the legal maximum for residential water pressure is often 80 PSI—but many experts recommend staying closer to 60 PSI.
Proper pressure means your showers feel strong, but not harsh, and your washing machine fills quickly without flooding. If the pressure is above the safe range, you may experience leaks at joints, faucet drips, or even burst hoses. With low pressure, you might notice that two people can’t shower at the same time, or that your sprinkler system doesn’t cover the lawn evenly.
Common Signs Of Pressure Problems
Here are some signs your water pressure may need adjusting:
- Low pressure: Slow-filling toilets, weak shower, dribbling faucets
- High pressure: Loud banging pipes (water hammer), leaks, appliances breaking down early
It’s also common to see uneven pressure between floors—strong on the first floor but weak upstairs—which usually signals an adjustment is needed.
If you notice these, it’s time to check your regulator.
Locating And Identifying Your Regulator
Before adjusting anything, you need to find your regulator. It’s usually installed:
- Near your main shutoff valve (often in the basement, crawl space, or garage)
- On the pipe coming in from the street or well
In some homes, especially older ones, the regulator might be outside in a covered box or meter pit. If you’re not sure, trace the main water line from where it enters the house. The regulator is usually not far from this entry point.
Regulators typically have:
- A round bell or dome
- A screw or bolt at the top for adjustments
- Sometimes a gauge nearby, showing PSI
If you’re unsure, look for markings like “PRV” (Pressure Reducing Valve).
Types Of Water Pressure Regulators
There are two main types:
- Diaphragm-type: Uses a rubber diaphragm inside to control pressure. Most common in homes.
- Piston-type: Found in larger buildings or commercial settings.
For homeowners, the diaphragm type is most likely.
Diaphragm regulators are quieter and handle small pressure changes well, which is why they’re preferred in residential settings. Piston types are more robust, but can sometimes stick if not maintained, making them a less ideal choice for homes.
Measuring Your Water Pressure
Before adjusting, you need to know your current water pressure. Here’s how:
- Buy a simple pressure gauge (costs about $10–$25 at hardware stores).
- Screw the gauge onto a hose bib (outdoor faucet) or laundry tap.
- Turn the faucet fully open and check the reading.
If it’s above 60 PSI, it’s too high. Below 40 PSI, too low. If you see big changes during the day, your regulator might be failing.
Don’t forget to check pressure at different times—morning, midday, and evening. City water supply can fluctuate, and a quick check at only one time of day might miss a problem.
Real-world Example
I once helped a neighbor whose pressure varied from 35 PSI to 90 PSI depending on the time of day. Their regulator was worn out, causing leaks and noisy pipes. Replacing and adjusting the regulator fixed the issue—and gave steady, comfortable pressure.
Another homeowner noticed their shower pressure dropped every time the washing machine ran. We tested pressure at several fixtures and found the regulator needed adjustment. After fine-tuning, all fixtures worked smoothly, even with multiple appliances running.
Safety Precautions Before Adjusting
Adjusting a water pressure regulator is safe for most homeowners, but follow these steps:
- Turn off water: Shut off the main supply before making adjustments.
- Wear eye protection: Sometimes, water can spray unexpectedly.
- Have towels ready: For minor leaks or drips.
- Know your limits: If your regulator looks corroded, damaged, or you’re unsure, call a licensed plumber.
Never force the adjustment screw—if it won’t turn easily, stop and get professional help.
Also, make sure children and pets are clear of the work area. Water can splash, and tools should not be left unattended.
How To Adjust Your Water Pressure Regulator
Here’s a step-by-step guide for adjusting a typical home pressure regulator. Remember: small changes can have big effects.
Step 1: Gather Your Tools
You’ll need:
- Adjustable wrench or pliers
- Flathead screwdriver (for most regulators)
- Pressure gauge (if you don’t already have one)
- Towel or rag
A flashlight can help if your regulator is in a dark corner or basement.
Step 2: Check Current Pressure
- Attach the pressure gauge to a faucet closest to the regulator.
- Open the faucet fully and note the PSI.
For a more accurate reading, make sure no other water is running in the house when you check the pressure.
Step 3: Locate The Adjustment Screw
- Find the screw or bolt on top of the regulator.
- The screw is usually under a plastic or metal cap.
If the cap is stuck, use your wrench gently to loosen it. Don’t use excessive force, as you could crack the regulator housing.
Step 4: Adjust The Pressure
- To increase pressure: Turn the screw clockwise (right) slowly.
- To decrease pressure: Turn the screw counterclockwise (left) slowly.
A quarter turn can change pressure by 5–10 PSI. Don’t turn too much at once.
If you want to make a big change, always do it in small steps. Wait a few minutes between adjustments to let the system stabilize.
Step 5: Test And Fine-tune
- Open the faucet and check the gauge after each adjustment.
- Wait a minute for pressure to stabilize.
- Repeat if needed, but don’t exceed 60 PSI.
Also, check pressure at a fixture on another floor if possible—sometimes pressure can differ slightly between levels.
Step 6: Secure And Clean Up
- Replace any cap you removed.
- Wipe up water.
- Double-check there’s no leak at the regulator.
Inspect the area around the regulator for any sign of drips or moisture, especially if your regulator is older.
Step 7: Check All Fixtures
- Test showers, faucets, toilets.
- Make sure pressure feels right everywhere.
Ask family members to try the shower or run water in different rooms. This can reveal hidden issues, like a partially blocked pipe or worn-out faucet.
Case Study: Adjusting Pressure After A Remodel
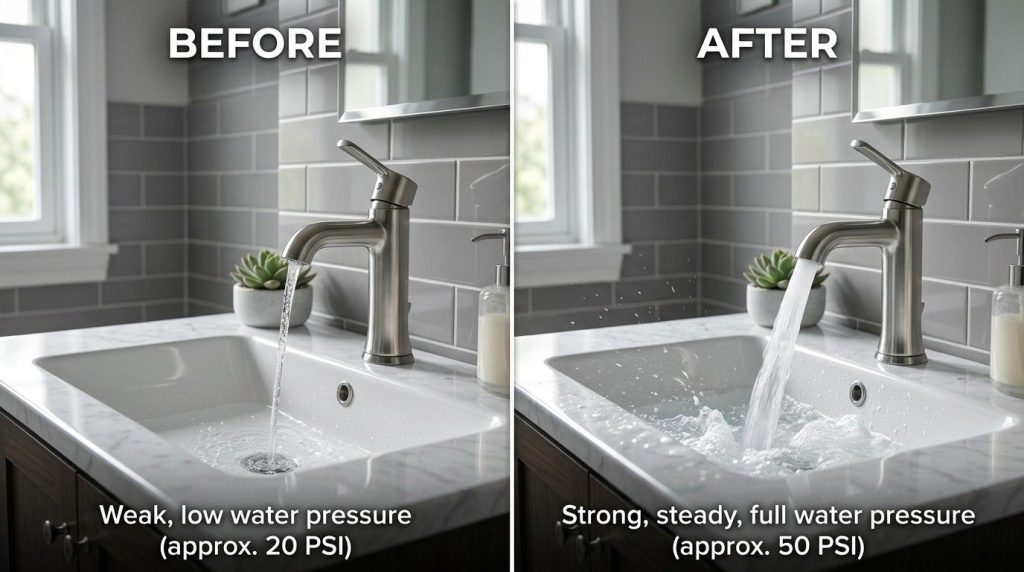
During a bathroom remodel, a homeowner noticed the shower was too weak, even with new fixtures. Pressure measured at 35 PSI. Adjusting the regulator to 50 PSI improved shower performance and cut down appliance fill times. This also reduced noise in the pipes.
The key was making small, careful adjustments—never big jumps.
In another case, a family added a second bathroom and found water pressure dropped when both showers ran. After adjusting the regulator up by just 8 PSI, both showers worked well, and there were no leaks.
Comparing Water Pressure Regulator Types
Choosing the right regulator matters if you need to replace yours. Here’s a quick comparison:
| Type | Best For | Durability | Typical Price |
|---|---|---|---|
| Diaphragm | Homes | 8–12 years | $40–$100 |
| Piston | Large buildings | 10–15 years | $80–$250 |
Most homes use diaphragm-type regulators. They’re easy to adjust and replace, but should be checked every few years.
If your water contains a lot of sediment or minerals, consider a regulator with a built-in filter. This helps keep debris out of the system and extends the life of your regulator.
Common Mistakes When Adjusting Regulators
Many homeowners make errors when adjusting their regulators. Here are some to avoid:
- Turning the screw too much: Small adjustments are safer. Over-adjusting can cause big problems.
- Ignoring leaks: Even tiny leaks near the regulator can lead to water damage.
- Not checking all fixtures: Pressure can vary from room to room.
- Skipping pressure checks: Always measure before and after adjusting.
- Forgetting to secure caps: Caps keep the adjustment screw clean and dry.
- Adjusting with water on: Always turn off the main supply to prevent accidents.
- Not calling a plumber when unsure: If the regulator is old, rusted, or you see complex pipes, get expert help.
Some beginners forget to bleed air from the lines after adjusting. Run water for a few minutes at several taps to remove any trapped air, which can make noises in the pipes.
When To Call A Licensed Plumber
There are times when DIY is not enough. Call a professional if:
- Your regulator is more than 10 years old.
- You see rust, corrosion, or cracks.
- The adjustment screw is stuck.
- Water pressure changes wildly during the day.
- You notice frequent leaks or water hammer.
- You’re uncomfortable with plumbing tools.
A plumber can diagnose deeper issues, replace regulators, or update old piping. Licensed plumbers have the right equipment and knowledge to keep your home safe.
If you have a well system or booster pump, professional help is even more important—these setups are more complex and mistakes can lead to expensive repairs.
Troubleshooting Pressure Problems
If adjusting your regulator doesn’t fix the issue, try these tips:
Low Pressure After Adjustment
- Check for clogged aerators or showerheads.
- Look for kinks in supply lines.
- Make sure regulator is not blocked by debris.
It’s also possible that a hidden leak in the system is lowering pressure—look for damp spots or unusually high water bills.
High Pressure After Adjustment
- Regulator may be faulty or worn out.
- Test with another gauge to confirm readings.
- Inspect for leaks at valves and joints.
If you hear a whistling or hissing sound, it could mean a loose valve or worn washer is letting extra water through.
Pressure Fluctuations
- City water supply may vary. Regulators sometimes fail after years of use.
- Consider replacing the regulator if the problem persists.
Pressure surges can also be caused by municipal work on water lines or by automatic irrigation systems starting or stopping. If you have a sprinkler timer, check pressure before and after it runs.
Example: Solving Pressure Fluctuations
In a recent job, a homeowner had pressure jumping from 45 to 75 PSI. The regulator was over 12 years old and leaking. Installing a new diaphragm-type regulator solved the problem, and the pressure stayed steady at 55 PSI.
Another case involved fluctuating pressure in a home with a basement laundry. The cause was a partially blocked regulator—a quick cleaning solved the issue without needing a full replacement.
Practical Tips For Homeowners
- Test water pressure every year, especially after plumbing repairs.
- Keep your regulator clean and dry—wipe dust and water off regularly.
- Replace regulators every 8–12 years, even if they seem fine.
- Always know where your main shutoff is for emergencies.
- Consider installing a pressure gauge permanently for easy monitoring.
An extra tip: If you’re planning a major renovation, check the regulator before and after. New fixtures or added bathrooms can change how your system handles pressure.
Water Pressure Regulator Maintenance
Regular maintenance keeps your regulator working well.
Annual Inspection
- Check for visible leaks, rust, or corrosion.
- Test water pressure with a gauge.
- Listen for strange noises in pipes.
If your regulator is outside, remove leaves or debris from around the unit so it’s easy to inspect.
Cleaning And Lubrication
- Wipe regulator exterior with a damp cloth.
- Lubricate adjustment screw if needed (use plumber’s grease).
Never use household oils, as they can damage rubber parts inside the regulator.
Replacement
If your regulator fails inspection, replace it. Regulators are inexpensive compared to fixing water damage.
If you notice green or white mineral buildup, this is a sign of slow leaks or corrosion—don’t wait to replace the unit.
Comparing Diy Vs Professional Adjustment
Sometimes homeowners wonder if DIY is worth it. Here’s a simple comparison:
| Method | Cost | Time Needed | Risk | Best For |
|---|---|---|---|---|
| DIY Adjustment | $10–$30 (tools and gauge) | 30–60 minutes | Low (if careful) | Simple adjustments |
| Professional Service | $80–$250 (service call) | 60–120 minutes | None (expert does it) | Complex issues, old regulators |
For most simple adjustments, DIY is safe. But for old or complex systems, pay for a pro.
Also, if you ever feel uncertain or nervous, remember that hiring a pro can save you stress and prevent costly mistakes.
Case Study: Upgrading After Pipe Damage
A homeowner in Ohio experienced a burst pipe after a pressure spike. The regulator had failed, and pressure went over 100 PSI. After replacing the regulator and adjusting to 50 PSI, the new pipes lasted longer, and water bills dropped.
This showed how crucial it is to monitor and adjust regulators regularly.
In another example, a family with young children suffered a flooded basement due to a failed regulator. Now, they test pressure every few months and have peace of mind knowing their home is safe.
Key Data: Water Pressure And Appliance Lifespan
Higher water pressure can shorten the life of appliances. Here’s some data:
- Dishwashers and washing machines: Last up to 50% longer with pressure below 60 PSI.
- Water heaters: Can fail early if pressure is above 80 PSI.
- Pipe joints: Prone to leaks and bursts at high pressure.
Maintaining correct pressure protects your home and saves money.
Many manufacturers may void warranties if appliances are damaged by excessive water pressure—another good reason to keep pressure in check.
How Water Pressure Regulators Work
Water pressure regulators use a spring and diaphragm to reduce incoming pressure to a safe level. When water enters, the diaphragm senses pressure and adjusts flow. Turning the adjustment screw changes the spring tension, raising or lowering pressure.
Example: Spring Tension
If the spring is tight, more water flows through, increasing pressure. Loosening the spring reduces flow and lowers pressure. This simple mechanism keeps your plumbing system safe.
If you ever open a regulator, you’ll see the spring and diaphragm working together—when the pressure rises, the diaphragm pushes back, reducing flow. When pressure drops, the spring opens the valve more, letting in extra water.
Choosing A Replacement Regulator
If you need a new regulator, consider these factors:
- Size: Match your pipe diameter (most homes use ¾” or 1”).
- Material: Brass is durable and corrosion-resistant.
- Pressure range: Choose a regulator with an adjustable range (25–75 PSI).
- Brand: Stick to trusted brands like Watts, Zurn, Wilkins.
Check reviews and ask your plumber for recommendations.
A non-obvious tip: If your home has high sediment in the water, ask for a regulator with an integrated filter screen. This tiny detail can add years to your plumbing’s life.
Installation Tips For New Regulators
If installing a new regulator, follow these steps:
- Turn off main water supply.
- Remove old regulator (may need a pipe wrench).
- Clean pipe threads and area.
- Install new regulator, using Teflon tape for a tight seal.
- Open water supply slowly and check for leaks.
- Adjust pressure as needed.
If you’re unsure, hire a plumber. Incorrect installation can cause leaks or water damage.
Always check local building codes—some areas require a licensed plumber for main line work.
Long-term Benefits Of Proper Adjustment
Keeping water pressure within the ideal range helps:
- Reduce leaks and water damage
- Extend appliance life
- Lower water bills
- Prevent noisy pipes
- Provide comfortable showers and faucet flow
A well-adjusted regulator is a small investment that pays off.
You’ll also avoid expensive emergencies—like burst pipes or flooded basements—that can happen with unchecked high pressure.
Expert Advice: What To Watch Out For
As a home improvement expert, I often see these overlooked issues:
- Ignoring pressure changes after plumbing upgrades: Always re-check pressure after adding new fixtures.
- Failing to check outdoor faucets: Sometimes outside taps show different pressure than indoor ones.
- Neglecting basement pipes: Regulators are often installed in basements; check there for leaks.
Other things to watch for: If you notice that water filters, ice makers, or humidifiers are failing often, high pressure could be the reason. Regular testing can save you from repeated repair bills.
Stay proactive, and your plumbing will serve you well for years.
Frequently Asked Questions
What Is The Ideal Water Pressure For A Home?
The ideal water pressure for most homes is 40–60 PSI. This range provides good flow without stressing pipes or appliances. If you want stronger showers, aim for the higher end, but don’t go above 60 PSI.
How Often Should I Check My Water Pressure Regulator?
Check your water pressure regulator once a year, especially after plumbing repairs or upgrades. If you notice new leaks, noisy pipes, or changes in flow, test pressure right away.
Can Adjusting The Regulator Damage My Plumbing?
If you adjust slowly and stay within safe limits (below 60 PSI), it won’t damage your plumbing. Turning the screw too much or forcing it can cause leaks or regulator failure.
What Should I Do If My Regulator Won’t Adjust?
If the adjustment screw is stuck, corroded, or won’t change pressure, stop and call a licensed plumber. Forcing it can break the regulator and cause leaks.
Where Can I Find More Information About Water Pressure Regulators?
For more detailed information, visit Wikipedia, which covers types, functions, and technical details.
Keeping your water pressure regulator in good shape is a smart move for any homeowner. With regular checks and careful adjustments, you’ll enjoy better water flow, safer pipes, and longer-lasting appliances. If in doubt, don’t hesitate to call a pro—protecting your home is always worth the effort.