Your Trusted Source for Home Fixes & Guides


How to Fix a Leaky Sink: Simple Steps for a Quick Repair

How to Fix a Leaky Sink is a valuable DIY skill that can save water, reduce repair costs, and prevent damage to your home. If you’re wondering how to fix a leaky sink, most leaks can be repaired with a few basic tools and the right approach. This guide explains the common causes of sink leaks and provides step-by-step instructions to help you stop drips and keep your plumbing working properly.
The good news? Most leaks are simple to fix if you follow the right steps, use the correct tools, and stay safe. This guide will walk you through everything you need to know, from identifying the leak to making repairs, and knowing when to call a pro.
Whether you’re a DIY beginner or just want to save money, you’ll find clear instructions, helpful tips, and real-life advice here.
Common Types Of Sink Leaks
Before grabbing your wrench, you need to know where the leak is coming from. Sinks can leak in several ways, and each needs a different fix.
- Faucet leaks: Water drips from the spout, handles, or base. Usually caused by worn washers or seals. These are the most common and often start as a slow drip before becoming worse.
- Drain leaks: Water seeps around the drain basket or pipe connections below. Often due to loose nuts or old plumber’s putty. You might see water under the sink or notice bad smells from standing water.
- Supply line leaks: Water drips from the hoses or valves under the sink. This can mean a cracked hose or loose fitting. These leaks can quickly become large, especially if the supply line bursts.
- Sink rim leaks: Water escapes between the sink and countertop. Caused by failed caulk or sealant. You might see water stains or swelling around the edges of the countertop.
Identifying the exact leak location saves time and prevents unnecessary repairs. Check with a dry paper towel—wipe around each area and see where it gets wet. Sometimes, you may need to repeat this process after running both hot and cold water, as some leaks only appear under certain conditions.
Remember, water travels—the visible drip may be far from the actual source.
Tools And Materials You’ll Need
Having the right tools makes repairs easier. Here’s what you should gather before starting:
- Adjustable wrench for tightening or loosening most nuts under the sink.
- Basin wrench (for hard-to-reach nuts) especially useful when working behind deep or double sinks.
- Screwdriver set (both flathead and Phillips).
- Pliers for gripping and turning.
- Plumber’s putty to seal drains and some connections.
- Pipe thread tape (Teflon tape) for sealing threaded connections and preventing leaks.
- Replacement washers or O-rings to fix worn-out faucet parts.
- Caulk and caulk gun for sealing around the sink rim.
- Bucket to catch drips and prevent mess.
- Rags or paper towels for cleaning up water and wiping surfaces.
- Flashlight to see in dark cabinets or behind pipes.
- Gloves to protect your hands from sharp edges or chemicals.
- Safety goggles if you’re cutting or working with pressurized lines.
If you don’t have these tools, check your local hardware store. Most fixes don’t require expensive equipment. Buying a small set of plumbing tools can save you money in the long run, especially if you plan to handle more repairs yourself.
Safety Precautions
Plumbing repairs are usually safe, but accidents happen. Keep these tips in mind:
- Turn off water supply. Always shut the valves under the sink before starting. This step is non-negotiable—even a small spray can cause a big mess.
- Wear gloves and goggles. Protect your hands and eyes from debris or chemicals, especially if you’re cleaning old caulk or using chemical cleaners.
- Use proper lighting. A flashlight helps you see leaks clearly. Shadows can hide the source of a drip, so don’t rely on overhead kitchen or bathroom lights alone.
- Avoid electrical outlets. Water and electricity can be dangerous. Dry spills quickly. If your sink is near electrical appliances, unplug them before starting work.
If you smell gas or see sparks, stop immediately and call a professional. Don’t risk your health or home for a DIY fix. And if you’re ever unsure, err on the side of caution.
Diagnosing The Leak: Step-by-step
Finding the leak is half the battle. Here’s a simple process to pinpoint the problem:
- Clear out the cabinet. Remove cleaning products, trash cans, and anything else under the sink. This gives you a clean work area and prevents items from getting wet or damaged.
- Dry everything. Use a rag to wipe pipes, fittings, and the bottom of the sink. Water from an earlier leak can make it hard to see where new drips are coming from.
- Turn on the faucet. Watch for drips or puddles. Sometimes a leak only appears when water is running.
- Check supply lines. Feel for moisture along hoses and shutoff valves. A slow leak here often collects at the lowest point before dripping.
- Inspect the drain. Fill the sink, then let water out. Look for leaks at the drain basket or trap. If the leak appears only when draining, the problem is likely with the drain assembly.
- Check faucet base and handles. Run water and look for seepage around the faucet. You may need to gently wiggle the handles or spout to see if movement causes more leaking.
If you can’t find the leak, try using a colored tissue or paper towel—water will show up easily. Sometimes, putting a mirror behind pipes helps you see spots you’d otherwise miss.
How To Fix A Faucet Leak
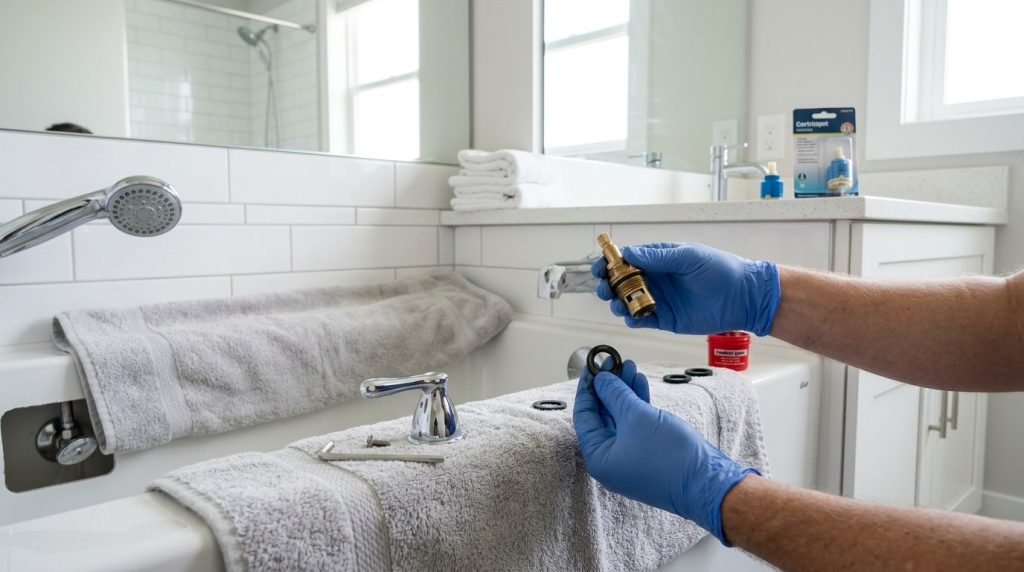
Most faucet leaks are caused by worn washers, O-rings, or cartridges. Here’s how to fix a simple drip:
Step 1: Turn Off The Water
Find the shutoff valves under the sink and turn them clockwise. If you can’t find them, shut off the main water supply. Once off, open the faucet to release pressure and drain leftover water.
Step 2: Remove The Handle
Use a screwdriver to remove the screw holding the faucet handle. Gently lift the handle off. Sometimes, the screw is hidden under a decorative cap—pry this off carefully with a flathead screwdriver.
Step 3: Take Out The Cartridge Or Stem
Depending on your faucet type (compression, cartridge, ball, or ceramic disc), you may need a wrench or pliers. Remove the retaining nut, then pull out the cartridge or stem. Keep track of the order and orientation of parts—you may want to take photos as you go.
Step 4: Inspect And Replace Washers/o-rings
Look for worn or cracked washers and O-rings. Replace them with new parts from a hardware store. Make sure they match the old ones in size and thickness. Even a small size difference can cause leaks to continue.
Step 5: Reassemble The Faucet
Put everything back in reverse order. Tighten but don’t over-tighten nuts. Over-tightening can strip threads or crack metal.
Step 6: Test For Leaks
Turn the water back on and run the faucet. If the drip is gone, you’ve fixed it! Watch for a few minutes to be sure.
Practical Tips
- Always take the old washer or cartridge to the store for comparison. There are many similar-looking parts.
- Don’t force parts—they should fit snugly. If something feels wrong, double-check the instructions or part numbers.
- If you’re unsure of your faucet type, search online using the manufacturer’s name. Many brands have repair guides or videos.
Beginner mistake: forgetting to plug the sink drain while working. Small screws or springs can easily fall in!

How To Fix A Drain Leak
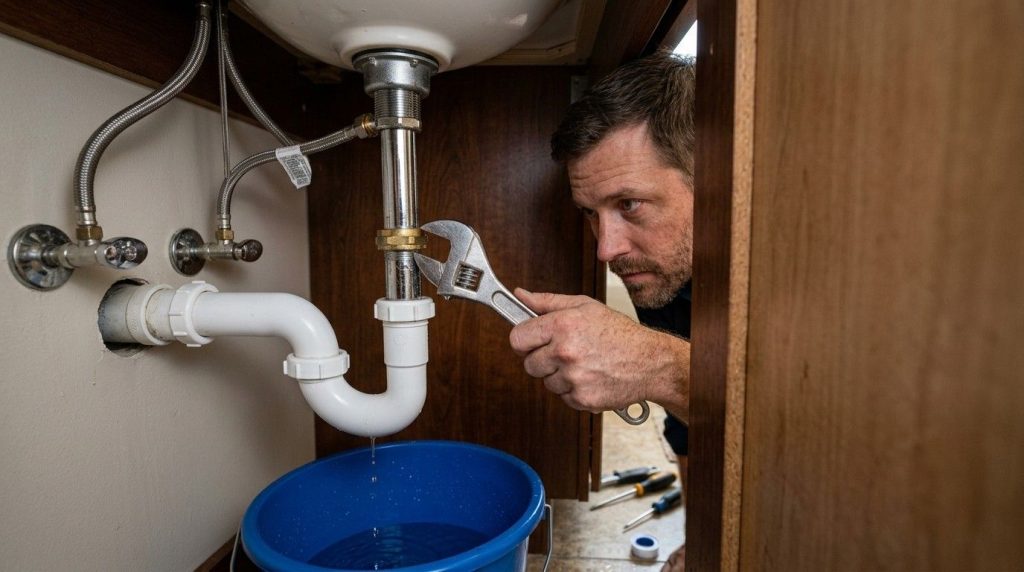
Drains leak for two main reasons: failed seals at the drain basket or loose connections in the pipes below.
Step 1: Tighten The Locknut
Under the sink, use a wrench to tighten the locknut holding the drain basket. Don’t overtighten—it can crack the sink. A quarter turn at a time is safest.
Step 2: Reseal The Drain Basket
If tightening doesn’t work, you need to reseal the drain.
- Remove the drain basket using pliers.
- Clean off old plumber’s putty or sealant. Scrape carefully so you don’t scratch the sink.
- Roll fresh plumber’s putty into a rope and place around the basket lip. Press it evenly for a good seal.
- Reinstall the basket and tighten the locknut.
Step 3: Check Pipe Connections
Inspect the slip nuts and washers on the drainpipes (P-trap and tailpiece). Tighten loose nuts and replace worn washers. Plastic washers should be replaced if they feel brittle.
Step 4: Test For Leaks
Run water and check for drips. If the leak persists, you may need new pipes. Old metal pipes can develop pinhole leaks from corrosion.
Practical Advice
- Don’t use silicone sealant on metal drain baskets—it’s hard to remove later. Plumber’s putty is designed to stay flexible and is easy to clean up.
- If the trap is old or corroded, replace it with a PVC kit. PVC is inexpensive, resists corrosion, and is easy to cut and fit.
Extra tip: When reassembling pipes, hand-tighten first and finish with a wrench, but never over-tighten.
How To Fix Supply Line Leaks
Supply lines connect the faucet to your water supply. Leaks here can cause major water damage.
Step 1: Turn Off Water Supply
Always turn off the valves before working. Open the faucet to relieve pressure.
Step 2: Inspect The Hoses
Look for cracks, bulges, or rust on the hoses. Check the fittings at both ends. If you see green or white deposits, that’s a sign of a slow leak.
Step 3: Tighten Connections
If the leak is at the fitting, use a wrench to gently tighten. If it’s still leaking, wrap the threads with Teflon tape. This tape helps seal tiny gaps.
Step 4: Replace The Hose
If the hose is damaged, remove it and install a new one. Use flexible braided hoses—they last longer and are easier to work with. Make sure to buy the right length and connector type for your faucet.
Step 5: Turn Water On And Test
Check for leaks by running water for a few minutes. Wipe with a dry towel to be sure no slow drips remain.
Homeowner Tips
- Always replace both supply lines at the same time—they wear out together. If one fails, the other may be close behind.
- Never use old hoses for new faucets. Old hoses can introduce debris or fail quickly.
Hidden insight: Don’t twist hoses too much during installation—this weakens them and can cause future leaks.
How To Fix Sink Rim Leaks
Leaks at the rim are common in undermount sinks and drop-in sinks.
Step 1: Clean The Rim
Remove any old caulk or debris. Use a putty knife and rubbing alcohol. The surface must be dry for new caulk to stick.
Step 2: Apply New Caulk
Use a high-quality silicone caulk. Run a bead around the sink rim, then smooth with your finger. For a neat finish, use painter’s tape on both sides of the joint.
Step 3: Let Caulk Cure
Wait at least 24 hours before running water. Humid conditions may require longer.
Step 4: Test For Leaks
Splash water around the rim and check for seepage. Look underneath for hidden drips.
Helpful Advice
- Always use waterproof caulk designed for kitchens or bathrooms. Generic caulk may break down with water exposure.
- Don’t rush the curing process. If the caulk is still sticky, wait longer before using the sink.
Extra tip: If your countertop is swelling or warping, you may need to let it dry fully before re-caulking.
Case Study: Fixing A Kitchen Sink Leak
Let me share a real story from a recent job. A homeowner noticed water pooling under their kitchen sink. After clearing out the cabinet, I found the leak was at the drain basket.
The old plumber’s putty was dry and cracked. I removed the basket, cleaned off the debris, and applied fresh putty. After tightening everything and running water, the leak was gone.
What made this case interesting? The homeowner had tried using silicone, but it failed within months. Plumber’s putty is better for metal drains because it stays flexible. This small difference saved them from costly cabinet repairs.
Another lesson: the homeowner had ignored the leak for weeks, thinking it was just condensation. By the time they called, the cabinet floor was stained and starting to soften. Small leaks often lead to bigger repairs if not fixed quickly.
When To Call A Licensed Professional
Some leaks are simple, but others need expert help. Don’t risk your home or safety.
- Major leaks: If water is flooding or you can’t stop the leak, call a plumber immediately. Fast action can prevent thousands of dollars in damage.
- Hidden leaks: If you suspect water damage in walls or floors, get a pro to check. Mold can grow quickly in hidden spaces.
- Complex faucet types: Some modern faucets need special tools or parts. Touchless or single-handle faucets often have cartridges that are tricky to replace.
- If you’re unsure: Don’t guess. Licensed plumbers have the training and insurance to fix problems safely.
According to the National Association of Home Builders, plumbing repairs are one of the most common reasons homeowners call professionals. Also, repairs done incorrectly may void warranties or cause insurance issues.
Common Mistakes Homeowners Make
Even experienced DIYers slip up sometimes. Here are mistakes to avoid:
- Not turning off the water. Always shut valves first. Even a few seconds of running water can cause a mess.
- Using the wrong parts. Double-check sizes and types before buying. Take photos or bring parts to the store.
- Over-tightening nuts. This can crack pipes or fittings. Hand-tighten, then a small turn with a wrench.
- Skipping caulk or putty. Water finds any gap—seal everything.
- Ignoring small leaks. Even tiny drips can cause big damage over time. Early repairs save money.
- Forgetting safety gear. Gloves and goggles are essential. Pipes can be sharp, and chemicals can splash.
Also, some people rush through repairs. Take your time, follow steps, and double-check your work.
Comparison: Diy Vs Professional Repair
You might wonder whether to fix a sink yourself or hire a pro. Here’s a quick comparison:
| Factor | DIY Repair | Professional Repair |
|---|---|---|
| Cost | $10–$40 (parts only) | $150–$350 (service + parts) |
| Time | 1–2 hours | 30–60 minutes |
| Skill Needed | Basic tools, instructions | Advanced knowledge |
| Risk | Potential mistakes | Low |
| Warranty | None | Usually included |
If you’re comfortable with tools and instructions, DIY is cheaper. If you want peace of mind, go with a pro. Also, some pros offer a satisfaction guarantee, which can be valuable if you have an older home or complex plumbing.
How To Prevent Sink Leaks
Fixing leaks is good, but preventing them is even better. Here’s how:
- Check supply lines yearly. Replace if cracked or rusty. Flexible braided lines are inexpensive and reliable.
- Inspect drain connections. Tighten loose nuts and replace worn washers. Regular checks take only a minute.
- Keep caulk fresh. Re-caulk the sink rim every 2–3 years. Old caulk can let water seep into cabinets.
- Clean faucet aerators. Mineral buildup can cause leaks. Unscrew and soak in vinegar to remove deposits.
- Don’t overload cabinets. Heavy items can bump pipes. Store cleaning products away from plumbing to avoid knocks.
Another tip: after large temperature changes (like winter to summer), check pipes for condensation or leaks.
Simple maintenance keeps your plumbing healthy and avoids emergency repairs.
Data: Water Wasted By Leaky Sinks
Small leaks add up fast. According to the EPA, a single dripping faucet can waste over 3,000 gallons per year. That’s enough to fill a small swimming pool!
| Leak Type | Average Water Wasted (per year) | Potential Damage |
|---|---|---|
| Dripping Faucet | 3,000 gallons | Higher water bills |
| Drain Leak | 2,000 gallons | Cabinet damage, mold |
| Supply Line Leak | 5,000+ gallons | Flooding, structural damage |
Fixing leaks quickly saves water, money, and your home. And remember, water damage can lead to expensive repairs, including mold removal or cabinet replacement.
Step-by-step Summary: Fixing A Leaky Sink
Sometimes it helps to see all the steps in one place:
| Step | Action | Tips |
|---|---|---|
| 1 | Identify the leak location | Use dry towels or tissue |
| 2 | Turn off water supply | Always shut valves first |
| 3 | Gather tools and materials | Check sizes before buying |
| 4 | Repair the leak | Follow instructions for each type |
| 5 | Test for leaks | Run water and check all areas |
| 6 | Clean up and reassemble | Keep area dry and tidy |
Follow these steps, and you’ll tackle most sink leaks with confidence. Taking before-and-after photos can help track your work and make future repairs easier.
Non-obvious Insights
Some things aren’t obvious to beginners:
- Leaks can move. Water travels along pipes and surfaces. The leak may appear far from its source. Always trace water back to the highest point.
- Mineral deposits cause leaks. Hard water leaves deposits that damage washers and seals. Regular cleaning helps prevent this.
- Low water pressure after repair. If you notice weak flow, check the faucet aerator—it may have debris. A quick clean often solves the problem.
- Don’t ignore slow leaks. Even a slow drip can create mold or rot.
- Plumbing codes matter. In some areas, certain repairs (like supply line changes) may need to follow local codes. Check before making big changes.
Thinking ahead prevents problems. Always keep a basic plumbing kit and spare parts at home—they’re cheap insurance against future leaks.

Frequently Asked Questions
How Do I Know If My Sink Leak Is Serious?
If water is pooling, spreading, or causing stains, it’s serious. A steady drip is less urgent but should be fixed soon. If you see mold, soft cabinets, or smell musty odors, call a pro. Quick action can prevent long-term damage.
Can I Use Silicone Instead Of Plumber’s Putty?
Yes, but only for certain sinks. Silicone works well on plastic sinks or for sealing the rim. For metal drain baskets, plumber’s putty is better—it stays flexible and is easier to remove. Using the wrong sealant can make future repairs harder.
How Often Should I Check My Sink For Leaks?
Check under your sink every few months. Look for moisture, stains, or musty smells. After any plumbing work, check daily for a week. Early detection is the key to avoiding costly repairs.
What If The Leak Comes Back After Repair?
If you’ve replaced washers and tightened connections but the leak returns, you may have damaged pipes, a faulty faucet, or improper installation. Call a licensed plumber to avoid bigger problems. Persistent leaks may also be a sign of high water pressure or hidden cracks.
Is Fixing A Leaky Sink A One-person Job?
Usually, yes. Most repairs need only basic tools and two hands. For heavy sinks or hard-to-reach areas, a second person can help. If you’re uncomfortable, don’t hesitate to call a pro. For first-timers, having someone read instructions aloud can be helpful.
Fixing a leaky sink saves money, water, and prevents damage to your home. With the right tools, a careful approach, and this guide, you can handle most repairs yourself. Remember to stay safe, check your work, and don’t ignore small leaks.
If you run into trouble, a licensed plumber is just a call away.
For even more plumbing advice, you can check the EPA WaterSense Fix a Leak Week resources.
Taking care of your sink is one of the best ways to protect your home. Start with these steps, and you’ll feel more confident every time you turn on the faucet.