Your Trusted Source for Home Fixes & Guides

How to Fix a Loose Faucet Handle: DIY Steps for Homeowners

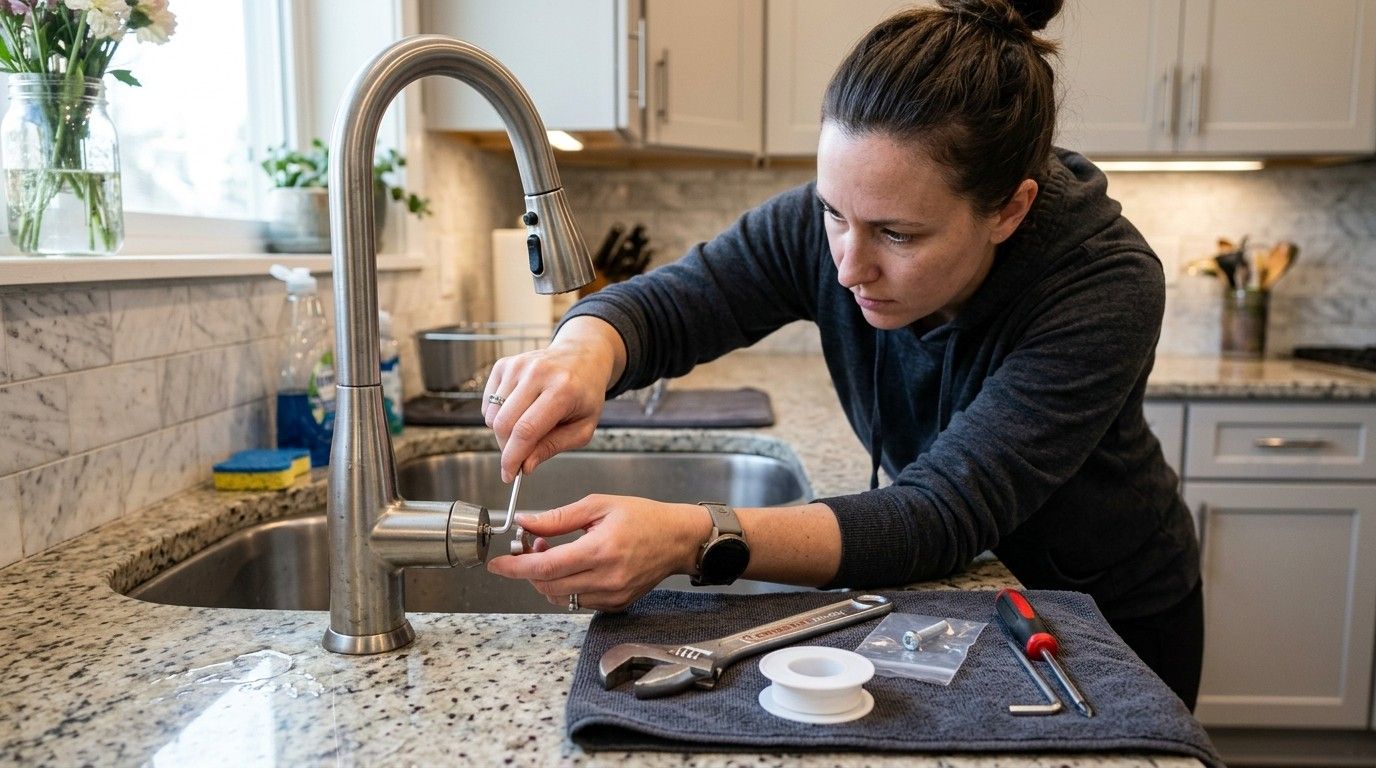
A loose faucet handle can be annoying. It wobbles when you turn the water on, sometimes spins without much control, or can even make a squeaky noise. How to Fix a Loose Faucet Handle is usually a straightforward DIY repair when you have the right tools and approach. Fixing the problem early can also help prevent further wear and potential plumbing issues. In this guide, you’ll learn the common causes of a loose handle and the simple steps to tighten and repair it.
You might end up with leaks, stripped screws, or even damage to the faucet’s cartridge or valve. The good news? Fixing a loose faucet handle is a simple DIY project for most homeowners. If you have a few basic tools and a bit of patience, you can often get it done in less than an hour.

In this guide, you’ll learn how to diagnose the problem, what tools you’ll need, and the steps to tighten or repair your faucet handle—whether it’s in your kitchen or bathroom. I’ll also cover the most common mistakes homeowners make, when to call a plumber, and how to prevent your faucet handle from getting loose again.
Real-life experience and practical advice are woven throughout, so you can feel confident tackling this fix yourself.
Why Faucet Handles Get Loose
Understanding why faucet handles get loose helps you fix the problem properly and avoid future headaches. Most handles become loose because their internal fasteners—usually a screw or a set screw—work themselves loose from regular use. Over time, water and soap can cause corrosion, or you might accidentally overtighten or strip the screw during cleaning or previous repairs.
Sometimes, the handle splines (the grooved part that connects the handle to the faucet stem) wear out. If the splines are stripped or damaged, tightening the screw won’t solve the problem. In rarer cases, the problem comes from inside the faucet body—like a worn cartridge or stem.
Common causes include:
- Normal use: Turning the handle daily loosens screws over time.
- Hard water: Buildup of minerals can affect internal parts.
- Improper installation: Screws or handles not tightened enough initially.
- Corrosion: Water exposure causes rust or mineral deposits.
- Aging parts: Old faucets simply wear out.
Catching the problem early means you can fix it with a few turns of a screwdriver. Waiting too long may mean you need replacement parts.
Tools And Materials You’ll Need
Before you start, gather the right tools. Most homes will have these on hand:
- Screwdriver: Phillips or flat-head, depending on your faucet.
- Allen wrench (hex key): For handles with a set screw.
- Adjustable wrench: In case you need to remove the faucet.
- Needle-nose pliers: Helpful for tight spots.
- Plumber’s grease: To lubricate moving parts.
- Towel or rag: To cover the drain and protect the sink.
- Flashlight: For better visibility.
- Replacement screws or handle: If the original is stripped or broken.
Optional but useful:
- White vinegar: For removing mineral deposits.
- WD-40: For loosening stuck screws.
- Thread seal tape: If you need to reinstall the handle.
Having everything ready saves time and reduces the risk of dropping screws down the drain—a common frustration.
Safety Precautions
While fixing a loose faucet handle is a low-risk project, safety still matters:
- Turn off the water supply if you need to remove parts from the faucet body.
- Always cover the drain with a towel or plug to prevent losing small screws or tools.
- Work slowly and use the right tool to avoid stripping screws.
- If you see rust, mold, or water damage around the faucet base, stop and consult a professional.
You don’t want a small repair to become a larger plumbing emergency.
Types Of Faucet Handles And How They Attach
Faucet handles come in a few main styles, and how you fix them depends on the design. Here’s a breakdown in a handy table:
| Handle Type | Common Attachment | Typical Tools Needed |
|---|---|---|
| Single Lever | Set screw (under or behind handle) | Allen wrench |
| Double Handle (Hot/Cold) | Phillips or flat-head screw (under cap) | Screwdriver |
| Knob Handle | Set screw or Phillips screw (side or center) | Allen wrench or screwdriver |
| Decorative/Designer | Hidden screw or snap-on | Varies—may need both tools |
Identify your faucet handle type before you start. Most bathroom and kitchen faucets use single lever or double handle designs.
Step-by-step Guide: How To Fix A Loose Faucet Handle
Let’s walk through the process. I’ll focus on the two most common types: single lever and double handle. If you have a specialty or designer faucet, the process is similar, but consult your manufacturer’s instructions.
1. Identify The Handle Type And Locate The Screw
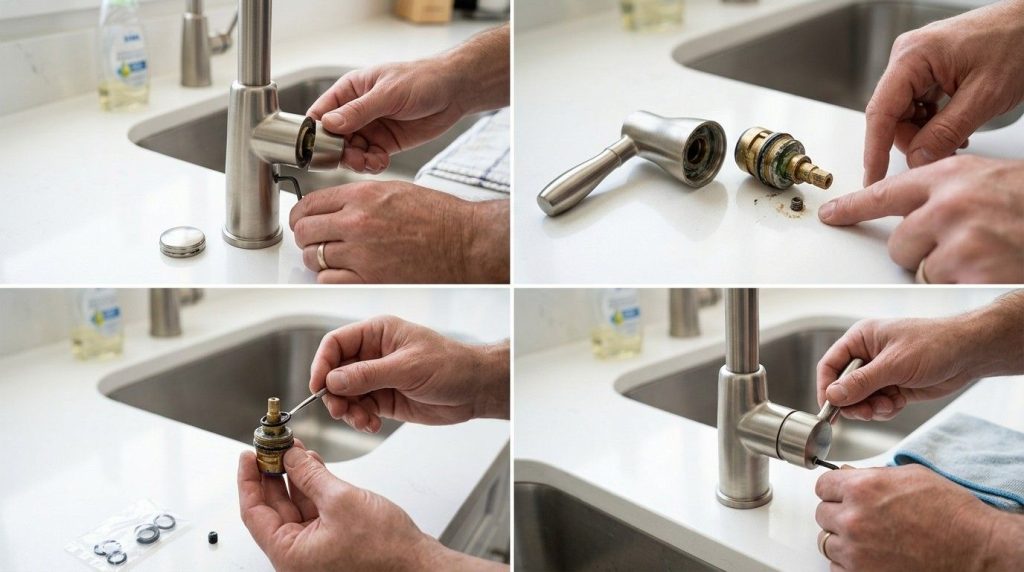
Examine your faucet. For a single lever, look for a small plug or cap—often a plastic or metal button—on the front, back, or top of the handle. For a double handle, you’ll see a hot and cold handle with a cap in the center.
Gently pry off the decorative cap with a flat-head screwdriver or your fingernail. Set it aside. You’ll usually see a screw underneath.
2. Prepare The Area
Lay a towel or rag in the sink to catch any falling screws or parts. This also prevents scratches. Place a flashlight nearby to help you see inside small holes or dark corners.
3. Tighten The Handle Screw
Use the correct tool:
- Phillips or flat-head screwdriver for most double handles.
- Allen wrench (hex key) for most single levers.
Insert the tool into the screw and turn it clockwise to tighten. You want the screw snug but not overtightened—too much force can strip the screw or damage the handle. The handle should feel firm and not wobble.
If the screw is corroded or stuck, spray a little WD-40 and wait five minutes before trying again. If the screw is stripped, you’ll need to replace it.
4. Reassemble And Test
Replace the decorative cap or plug. Turn the faucet on and off several times. Wiggle the handle. It should feel solid and move smoothly. If it’s still loose, you may have a worn handle or stem—go to the next steps.
5. Inspect For Wear Or Damage
Remove the handle completely by unscrewing the fastener all the way. Gently pull the handle off. Look at the handle splines (the grooves inside the handle) and the faucet stem (the part sticking out of the faucet body).
- If the splines are rounded, cracked, or stripped, the handle needs replacement.
- If the stem is damaged, the faucet may need a new cartridge or stem.
Clean the area with white vinegar if you see mineral deposits. Lubricate the stem with plumber’s grease for smoother operation.
6. Replace Damaged Parts (if Needed)
Take the old handle to your local hardware store to find an exact match. If the stem or cartridge is damaged, check your faucet brand and model. Replacement cartridges are usually available, but installation can be trickier—see the “When to Call a Pro” section below.
When installing a new handle or stem, reverse the removal process. Tighten the screw snugly, reattach the decorative cap, and test again.
7. Prevent Future Problems
A few simple habits help keep your faucet handle tight:
- Avoid using excessive force when turning the handle.
- Clean around the handle regularly to remove mineral buildup.
- Re-tighten the screw every six months if needed.
- Use plumber’s grease during reassembly to prevent corrosion.
Common Mistakes Homeowners Make
Many people try to fix a loose faucet handle but end up making it worse. Here are the top errors I’ve seen (and made) over 20 years of home improvement:
- Using the wrong tool: Forcing a flat-head into a Phillips screw strips the head.
- Overtightening: Too much torque can crack plastic handles or strip metal screws.
- Ignoring mineral buildup: Not cleaning out deposits means the handle won’t sit flush.
- Not turning off the water: Removing the handle without shutting off the supply risks leaks.
- Forgetting the drain cover: One dropped screw can mean an hour fishing it out of the P-trap.
- Replacing only the screw: Sometimes the handle or stem is the real problem, not the fastener.
If you make a mistake, don’t panic. Most are easy to fix with replacement parts and a bit of patience.
Case Study: Real-world Repair
Let’s look at an example from a recent client of mine in suburban Ohio. The homeowner noticed their kitchen faucet handle wobbling. They tried tightening the screw, but it kept coming loose. On closer inspection, the handle’s internal splines were stripped due to years of hard water buildup and aggressive turning.
Here’s how we fixed it:
- Removed the handle and soaked it in white vinegar to dissolve mineral deposits.
- Cleaned and lubricated the faucet stem with plumber’s grease.
- Replaced the stripped handle with a new one (cost: $12 at the hardware store).
- Tightened the new handle gently and checked for leaks.
Result: The handle felt solid, and the fix took less than 30 minutes. The homeowner was relieved they didn’t need a new faucet.
The lesson: Sometimes, a loose handle points to a deeper issue. Checking for wear and cleaning parts can save you money and headaches.
Comparing Faucet Handle Designs
Not all faucet handles are created equal. Some are easier to fix than others. Here’s a comparison to help you understand what you’re dealing with:
| Design | Ease of Repair | Replacement Part Cost | Common in |
|---|---|---|---|
| Single Lever | Easy | $5–$15 | Modern kitchens, bathrooms |
| Double Handle | Medium | $8–$20 (pair) | Older homes, classic designs |
| Designer/Custom | Hard | $25–$50+ | High-end remodels |
Single lever handles are usually the quickest to repair. Designer faucets may require special tools or parts.
When To Call A Licensed Plumber
Most loose faucet handles are DIY-friendly. But there are times when it’s safer (and cheaper in the long run) to call a licensed plumber:
- If the stem, cartridge, or faucet body is damaged.
- If water leaks from the faucet base.
- If you can’t remove a corroded or stuck screw.
- If you see mold, rust, or water damage around the sink or countertop.
- If the faucet is under warranty—DIY fixes may void coverage.
Trying to force a fix can break the faucet or cause leaks inside your cabinet. Plumbers have the right tools and experience to handle tricky repairs.
How To Choose Replacement Parts
When you need a new handle, screw, or stem, match the part to your faucet. Bring the old part to the hardware store, or take a photo and note the brand and model number. Many stores have faucet part guides to help you find a match.
Genuine manufacturer parts are best, but high-quality universal parts also work for many standard faucets. Avoid cheap, unbranded handles—they often don’t fit well and wear out quickly.
Preventing A Loose Faucet Handle In The Future
Maintenance is key. Here’s what I recommend to keep your faucet handles tight for years:
- Every six months, check and gently tighten handle screws.
- Clean around the handle with a mild cleaner and soft brush.
- Use plumber’s grease when reassembling handles.
- Avoid leaning or hanging heavy items (like wet towels) on the handle.
- Address leaks quickly—dripping water can loosen screws and cause corrosion.
A well-maintained faucet handle not only feels better but also lasts longer.
Troubleshooting Unusual Problems
If you’ve followed all the steps and your handle is still loose, here are a few less common issues:
- Loose mounting nut: The faucet base (under the sink) may be loose, causing the handle to wobble. Tighten the nut with an adjustable wrench.
- Worn faucet cartridge: The cartridge inside the faucet can wear out, causing play in the handle. Replace the cartridge if tightening the handle doesn’t help.
- Incorrect part installation: If you or a previous owner installed the wrong handle or screw, it may never fit properly. Get the correct part.
If you’re stuck, look up your faucet model’s repair manual or contact the manufacturer for help. For more detailed faucet diagrams and troubleshooting, you can check resources like Family Handyman.

Frequently Asked Questions
How Do I Know If My Faucet Handle Is Too Loose?
If your faucet handle wobbles when you turn it, spins without resistance, or feels unstable, it’s too loose. Sometimes you’ll hear a rattling sound or notice water leaking from the handle base.
Can I Fix A Loose Faucet Handle Without Turning Off The Water?
For simple tightening, you usually don’t need to shut off the water. But if you remove the handle or access parts inside the faucet, always turn off the supply to avoid leaks.
What If The Handle Keeps Getting Loose After I Tighten It?
If the handle won’t stay tight, the screw may be stripped or the handle splines worn out. Try replacing the screw first; if that doesn’t work, replace the handle. Check the stem for damage as well.
Is It Safe To Use Wd-40 On Faucet Screws?
Yes, a small amount of WD-40 can help loosen stuck or corroded screws. Wipe off any excess before reassembling, and avoid getting it on rubber or plastic parts.
When Should I Replace The Whole Faucet Instead Of The Handle?
Replace the entire faucet if you see cracks in the faucet body, repeated leaks, or if replacement parts are unavailable. If your faucet is over 15 years old and repairs don’t last, a new faucet is often more cost-effective.
A loose faucet handle is a common problem that most homeowners can fix with a few basic tools and clear steps. By understanding how handles attach, using the right approach, and maintaining your faucet, you can enjoy a sturdy, leak-free handle for years.
If you run into trouble or see signs of bigger issues, don’t hesitate to call a pro—sometimes the best DIY is knowing when to ask for help.