Your Trusted Source for Home Fixes & Guides

How to Install a Screen Door: Easy Guide for Beginners 2026

How to Install a Screen Door is a practical DIY project that can improve your home’s comfort, ventilation, and curb appeal. If you’re wondering how to install a screen door, the process is straightforward with the right tools and careful measurements. This guide walks you through each step, from preparing the doorway to securing the door for a smooth, long-lasting installation.
As someone who’s installed dozens of screen doors and helped neighbors avoid common mistakes, I’ll guide you through every step. You’ll learn which tools to use, how to get a perfect fit, and how to avoid the problems that frustrate first-timers.
By the end, you’ll be confident enough to tackle this project—and enjoy a breeze without inviting in the bugs.

Why Install A Screen Door?
A screen door does more than just let air flow through your home. It also keeps out pests and helps save energy by reducing the need for air conditioning. Many Americans add a screen door to their main entry or back porch, but they also work well for side and garage entryways.
Homes with screen doors report better ventilation and lower energy costs in warm months. A 2026 study by the U.S. Department of Energy found that cross-ventilation can lower indoor temperatures by up to 8°F, reducing cooling costs by 10–15%. That’s a meaningful difference if you’re watching your budget.
Screen doors also add value. According to the National Association of Realtors, buyers see them as a plus, especially in warmer regions. A well-installed screen door isn’t just a comfort—it’s a smart investment.
Types Of Screen Doors
Before you install, you need to choose the right screen door for your home. Here’s a quick comparison of the most popular types:
| Type | Material | Best For | Price Range |
|---|---|---|---|
| Traditional Hinged | Wood, Aluminum, Steel | Front/Back Doors | $50–$250 |
| Retractable | Aluminum, Vinyl | French/Patio Doors | $120–$500 |
| Sliding | Aluminum, Vinyl | Patio Doors | $100–$300 |
| Storm Door with Screen | Aluminum, Steel | All Climates | $150–$400 |
Most homeowners choose traditional hinged or storm doors for main entries. Retractable models are popular for patios. Hinged doors are often the simplest for DIYers.
Tools And Materials Needed
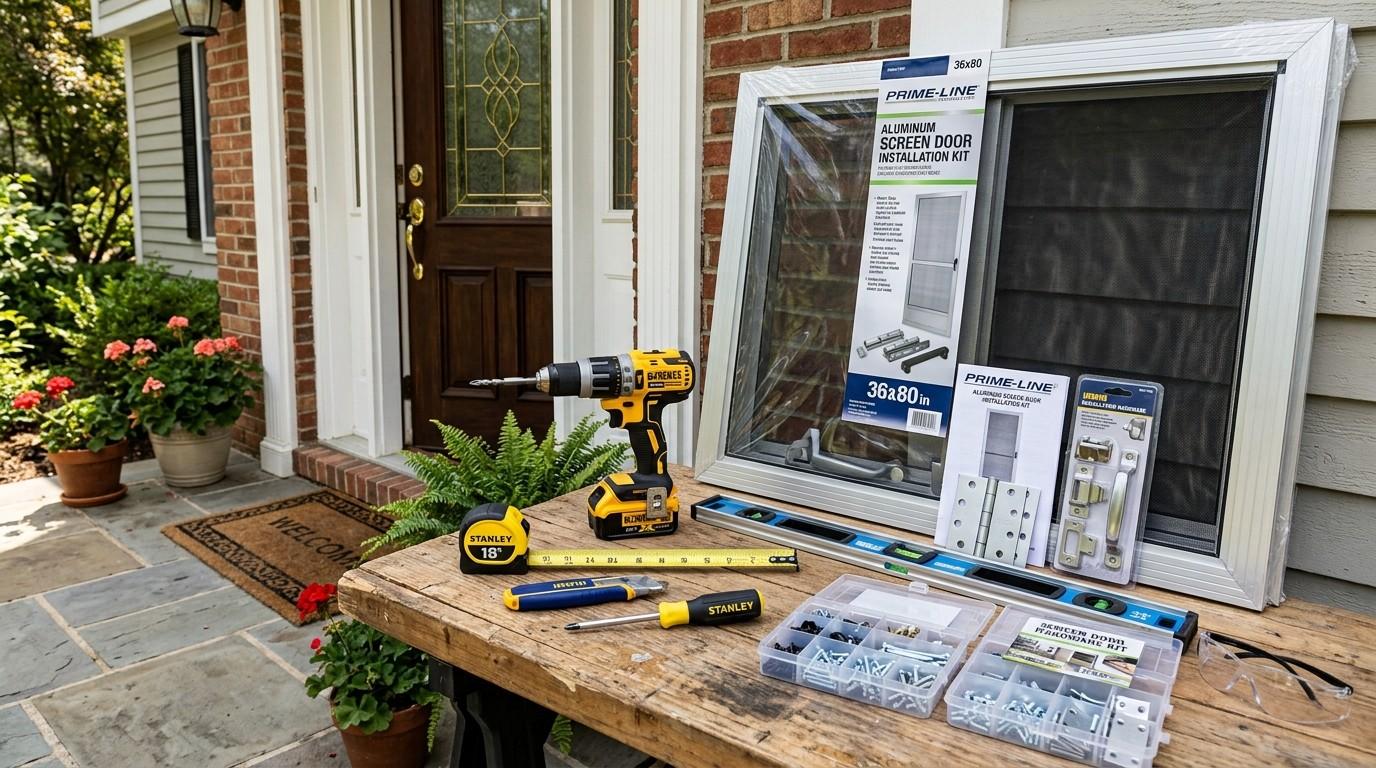
Having the right tools on hand makes your screen door installation faster and less stressful. Here’s what you’ll need for a basic hinged screen door:
- Measuring tape
- Drill and drill bits
- Phillips and flathead screwdrivers
- Hammer
- Level (2-foot or longer)
- Pencil
- Utility knife
- Tin snips (if you need to trim the screen frame)
- Safety glasses
- Work gloves
- Hacksaw (for trimming aluminum frames)
- Sawhorses or a sturdy table
Materials:
- Screen door (pre-hung or kit)
- Hinges (usually included with the door)
- Handle and latch set
- Closer (optional but recommended for smooth closing)
- Weather stripping (optional, for a tight seal)
- Mounting screws (usually included)
- Touch-up paint (optional)
Pro Tip: Always double-check what comes in the box before starting. Some kits include all hardware, but cheaper models may not.
Measuring For A Screen Door
Getting the right measurements is the most important step. If your door doesn’t fit, you’ll waste time and money. Here’s how to do it right:
- Measure the door frame opening (not the old door). Measure width at the top, middle, and bottom. Record the smallest number.
- Measure the height from the top of the threshold to the underside of the top trim.
- If your opening isn’t square (measure diagonals to check), plan to trim the door or add filler strips.
Common mistake: Many homeowners measure the old door instead of the opening. This can result in a screen door that doesn’t fit. Always measure the frame opening.
If your home is older, door frames may be out of square. Don’t worry—most screen doors can be trimmed slightly, or you can use shims and weather stripping.
Preparing The Doorway
Prep work is key to a neat, long-lasting installation.
- Remove the old door (if you have one). Unscrew hinges and gently lift the door off.
- Clean the frame: Dirt and debris can affect how the new door sits. Sweep or vacuum out dust, then wipe surfaces with a damp rag.
- Repair damaged wood: Fill gaps, cracks, or rot with wood filler or epoxy. Let dry fully before installing.
- Prime and paint: If your trim needs a touch-up, paint now. It’s easier before the new door goes in.
Safety tip: If your old door has glass, wear gloves and eye protection.
Case Study: One homeowner in Atlanta tried to install a new screen door over a rotted threshold. The screws wouldn’t hold, and the door sagged within weeks. After replacing the threshold and repainting the frame, the new installation lasted for years. Never skip repairs—hidden damage will come back to haunt you.
Step-by-step Installation Guide
This guide covers a standard hinged screen door, which is the most common DIY style. If you have a sliding or retractable door, always follow the manufacturer’s instructions.
Step 1: Dry Fit The Door
Before you attach anything, hold the screen door up to the frame. Check for fit at the top, bottom, and sides. The door should cover the opening without gaps but swing freely.
If it’s too wide or tall, use a hacksaw (for aluminum) or hand saw (for wood) to carefully trim. Remove a little at a time and re-check the fit.
Don’t rush: Many first-timers cut too much off in one go. Take your time and test often.
Step 2: Mark And Install Hinges
- Lay the door on sawhorses or a table.
- Place hinges about 6 inches from the top and bottom, with a third in the center for heavy doors.
- Mark screw holes with a pencil.
- Pre-drill holes to avoid splitting the wood or bending the metal.
- Attach hinges to the door using the included screws.
Pro Tip: If you’re reusing old hinge positions, make sure the new hinges line up. Fill old holes with wood filler if needed.

Step 3: Hang The Door
- With a helper holding the door in place, line up the hinges to the frame.
- Mark the screw holes on the frame.
- Pre-drill and attach the hinges to the door frame.
- Check that the door swings open and closed smoothly.
If the door scrapes, adjust the position by loosening screws and shifting slightly. Tighten all screws once the fit is correct.
Step 4: Install The Handle And Latch
- Choose a comfortable height, usually about 36–38 inches from the bottom.
- Mark the positions for the handle and latch.
- Drill holes as directed in the instructions.
- Attach the handle and latch, making sure the latch catches the frame securely.
Pro Tip: Some handles are reversible for left or right opening. Double-check before drilling holes.
Step 5: Add The Door Closer (optional)
A door closer gently pulls the screen door shut behind you. It’s optional, but highly recommended, especially if you have kids or pets.
- Mount the closer to the top or middle of the door, following the included template.
- Attach the bracket to the door frame.
- Adjust the tension as needed for smooth closing.
Common mistake: Installing the closer too low or too tight, causing the door to slam. Adjust tension slowly and test.
Step 6: Weather Stripping And Final Touches
- Add weather stripping to the sides and top to block drafts and bugs.
- Check all screws for tightness.
- Touch up any scratches or exposed wood with paint.
Double-check: Open and close the door several times. Make sure the latch works, the door swings freely, and there are no gaps.
Safety Precautions
- Always wear safety glasses when drilling or sawing.
- Use work gloves to protect from sharp metal edges.
- Don’t prop the door against a wall where it can fall.
- If you find signs of lead paint (in homes built before 1978), pause and consult a pro.
If electrical wiring, alarm sensors, or other systems are in the doorway, call a licensed contractor. Never drill near hidden wires.
Common Mistakes And How To Avoid Them
- Wrong measurements: Always measure the frame, not the old door.
- Skipping frame repairs: Install only on solid, damage-free trim.
- Over-tightening screws: This can strip holes, making hinges loose.
- Cutting too much off: Trim a little at a time and check fit often.
- Ignoring the swing direction: Make sure the door swings the right way for your entry.
- Not using a level: A crooked door won’t close right—check as you go.
- Installing hardware too close to the edge: This weakens the door and can cause splits.
- Forgetting weather stripping: Bugs and air can sneak in without it.
Homeowner tip: Keep leftover screws and hardware. You may need them if you ever need to adjust or repair the door.
When To Call A Professional
Most screen door installations are DIY-friendly, but sometimes it’s best to call in a pro:
- Your door frame is badly out of square (diagonal measurements differ by more than 1/2 inch).
- You need to cut into brick, stone, or metal.
- You find signs of rot, termites, or structural damage.
- You want a high-end custom screen door.
- You’re unsure about tools or safety.
A professional can handle complex adjustments, ensure a tight fit, and even match the door to your home’s style. Most jobs cost $100–$300 for labor, depending on difficulty and location.
Maintenance Tips For Long-lasting Screen Doors
A well-installed screen door can last for years with basic care. Here’s how to keep yours in top shape:
- Clean screens twice a year with soapy water and a soft brush.
- Lubricate hinges every spring with a drop of silicone spray or light oil.
- Check for tears in the mesh—repair small holes with a patch kit.
- Inspect hardware for looseness; tighten as needed.
- Keep the track clean (for sliding doors) by vacuuming out dirt and debris.
Expert tip: For aluminum screens, avoid harsh chemicals—they can cause pitting and discoloration. Mild soap is best.
Case Study: Fixing A Crooked Installation
One family in Dallas bought a screen door kit online. They measured carefully but forgot to use a level during installation. After mounting the door, it wouldn’t close without force. The latch wouldn’t catch, and the bottom dragged on the threshold.
A local handyman diagnosed the problem: the top hinge was slightly higher than the bottom, causing the door to hang crooked. He loosened the screws, adjusted the hinges with a level, and re-tightened. The door now closed smoothly and latched with a gentle push.
Lesson: Even small errors in alignment can create big problems. Always check with a level at each step.
Troubleshooting Guide
If you run into problems, here’s a quick reference:
| Problem | Possible Cause | Solution |
|---|---|---|
| Door won’t close fully | Hinges misaligned, frame not square | Adjust hinges, use shims, check with level |
| Latch doesn’t catch | Latch too high/low, frame warped | Reposition latch, add filler strip |
| Door scrapes floor | Door too tall, frame uneven | Trim bottom, use shims, check threshold |
| Screen is loose | Screen spline not tight, damaged mesh | Re-seat spline, replace mesh |
If these fixes don’t solve your problem, consult the manufacturer’s instructions or call a local handyman.
Upgrades And Custom Features
Screen doors have come a long way. Here are a few upgrades worth considering:
- Pet doors: Install a flap for easy pet access.
- Decorative grills: Add style and extra security.
- Retractable screens: Hide the screen when not in use.
- Heavy-duty screens: For homes with kids or pets, look for stainless steel mesh.
Some upgrades can be DIY, but others (like custom grills) may require a professional.
Environmental And Energy Benefits
Screen doors help reduce reliance on air conditioning, which is good for your wallet and the environment. By allowing natural airflow, you can cool your home with less energy. According to the U.S. Environmental Protection Agency, improving ventilation can lower indoor air pollutants by up to 20%. That’s healthier for your family, too.
Screen Door Brands To Consider
If you’re shopping for a new screen door, here are some trusted brands:
| Brand | Known For | Price Range |
|---|---|---|
| Andersen | Durable storm doors | $200–$400 |
| LARSON | Wide selection, easy DIY kits | $100–$350 |
| Pella | Custom options, high-end looks | $250–$600 |
| EMCO | Affordable, reliable | $80–$250 |
Always compare warranties and read reviews. A good door should last 10–15 years with normal use.
Frequently Asked Questions
How Long Does It Take To Install A Screen Door?
For most homeowners, installation takes about 2–4 hours, depending on your experience and the door type. Pre-hung doors and full kits are faster, while custom trimming adds time.
Can I Install A Screen Door Over My Existing Door?
Yes, most screen doors are designed to fit over standard exterior doors. Make sure there’s enough clearance and that the door swings the right way. Measure carefully before buying.
What If My Door Frame Isn’t Square?
Many homes have frames that aren’t perfectly square, especially older houses. Most screen doors can be trimmed or adjusted with shims and weather stripping. If the gap is more than 1/2 inch, consider hiring a professional.
How Do I Fix A Torn Screen?
Small tears can be patched with a screen repair kit, available at hardware stores. For larger damage, you may need to replace the mesh. This is a simple DIY job—just remove the spline, lay in new mesh, and press the spline back in.
Where Can I Find More Detailed Guides Or Videos?
For more step-by-step guides and video tutorials, check out the U.S. Department of Energy’s website at energy.gov.
A new screen door is a small project with a big payoff. With careful measuring, the right tools, and a steady hand, you can transform your entryway in a single afternoon. If you ever feel unsure, don’t hesitate to ask for help from a neighbor or local pro.
Your home—and your summer comfort—will thank you.